>>
30-MINUTE MEALS! Get the email series now →


Soft, creamy Biscoff cookie truffles dipped in vanilla chocolate — no baking required. Ready for holidays or any sweet craving with just three ingredients.
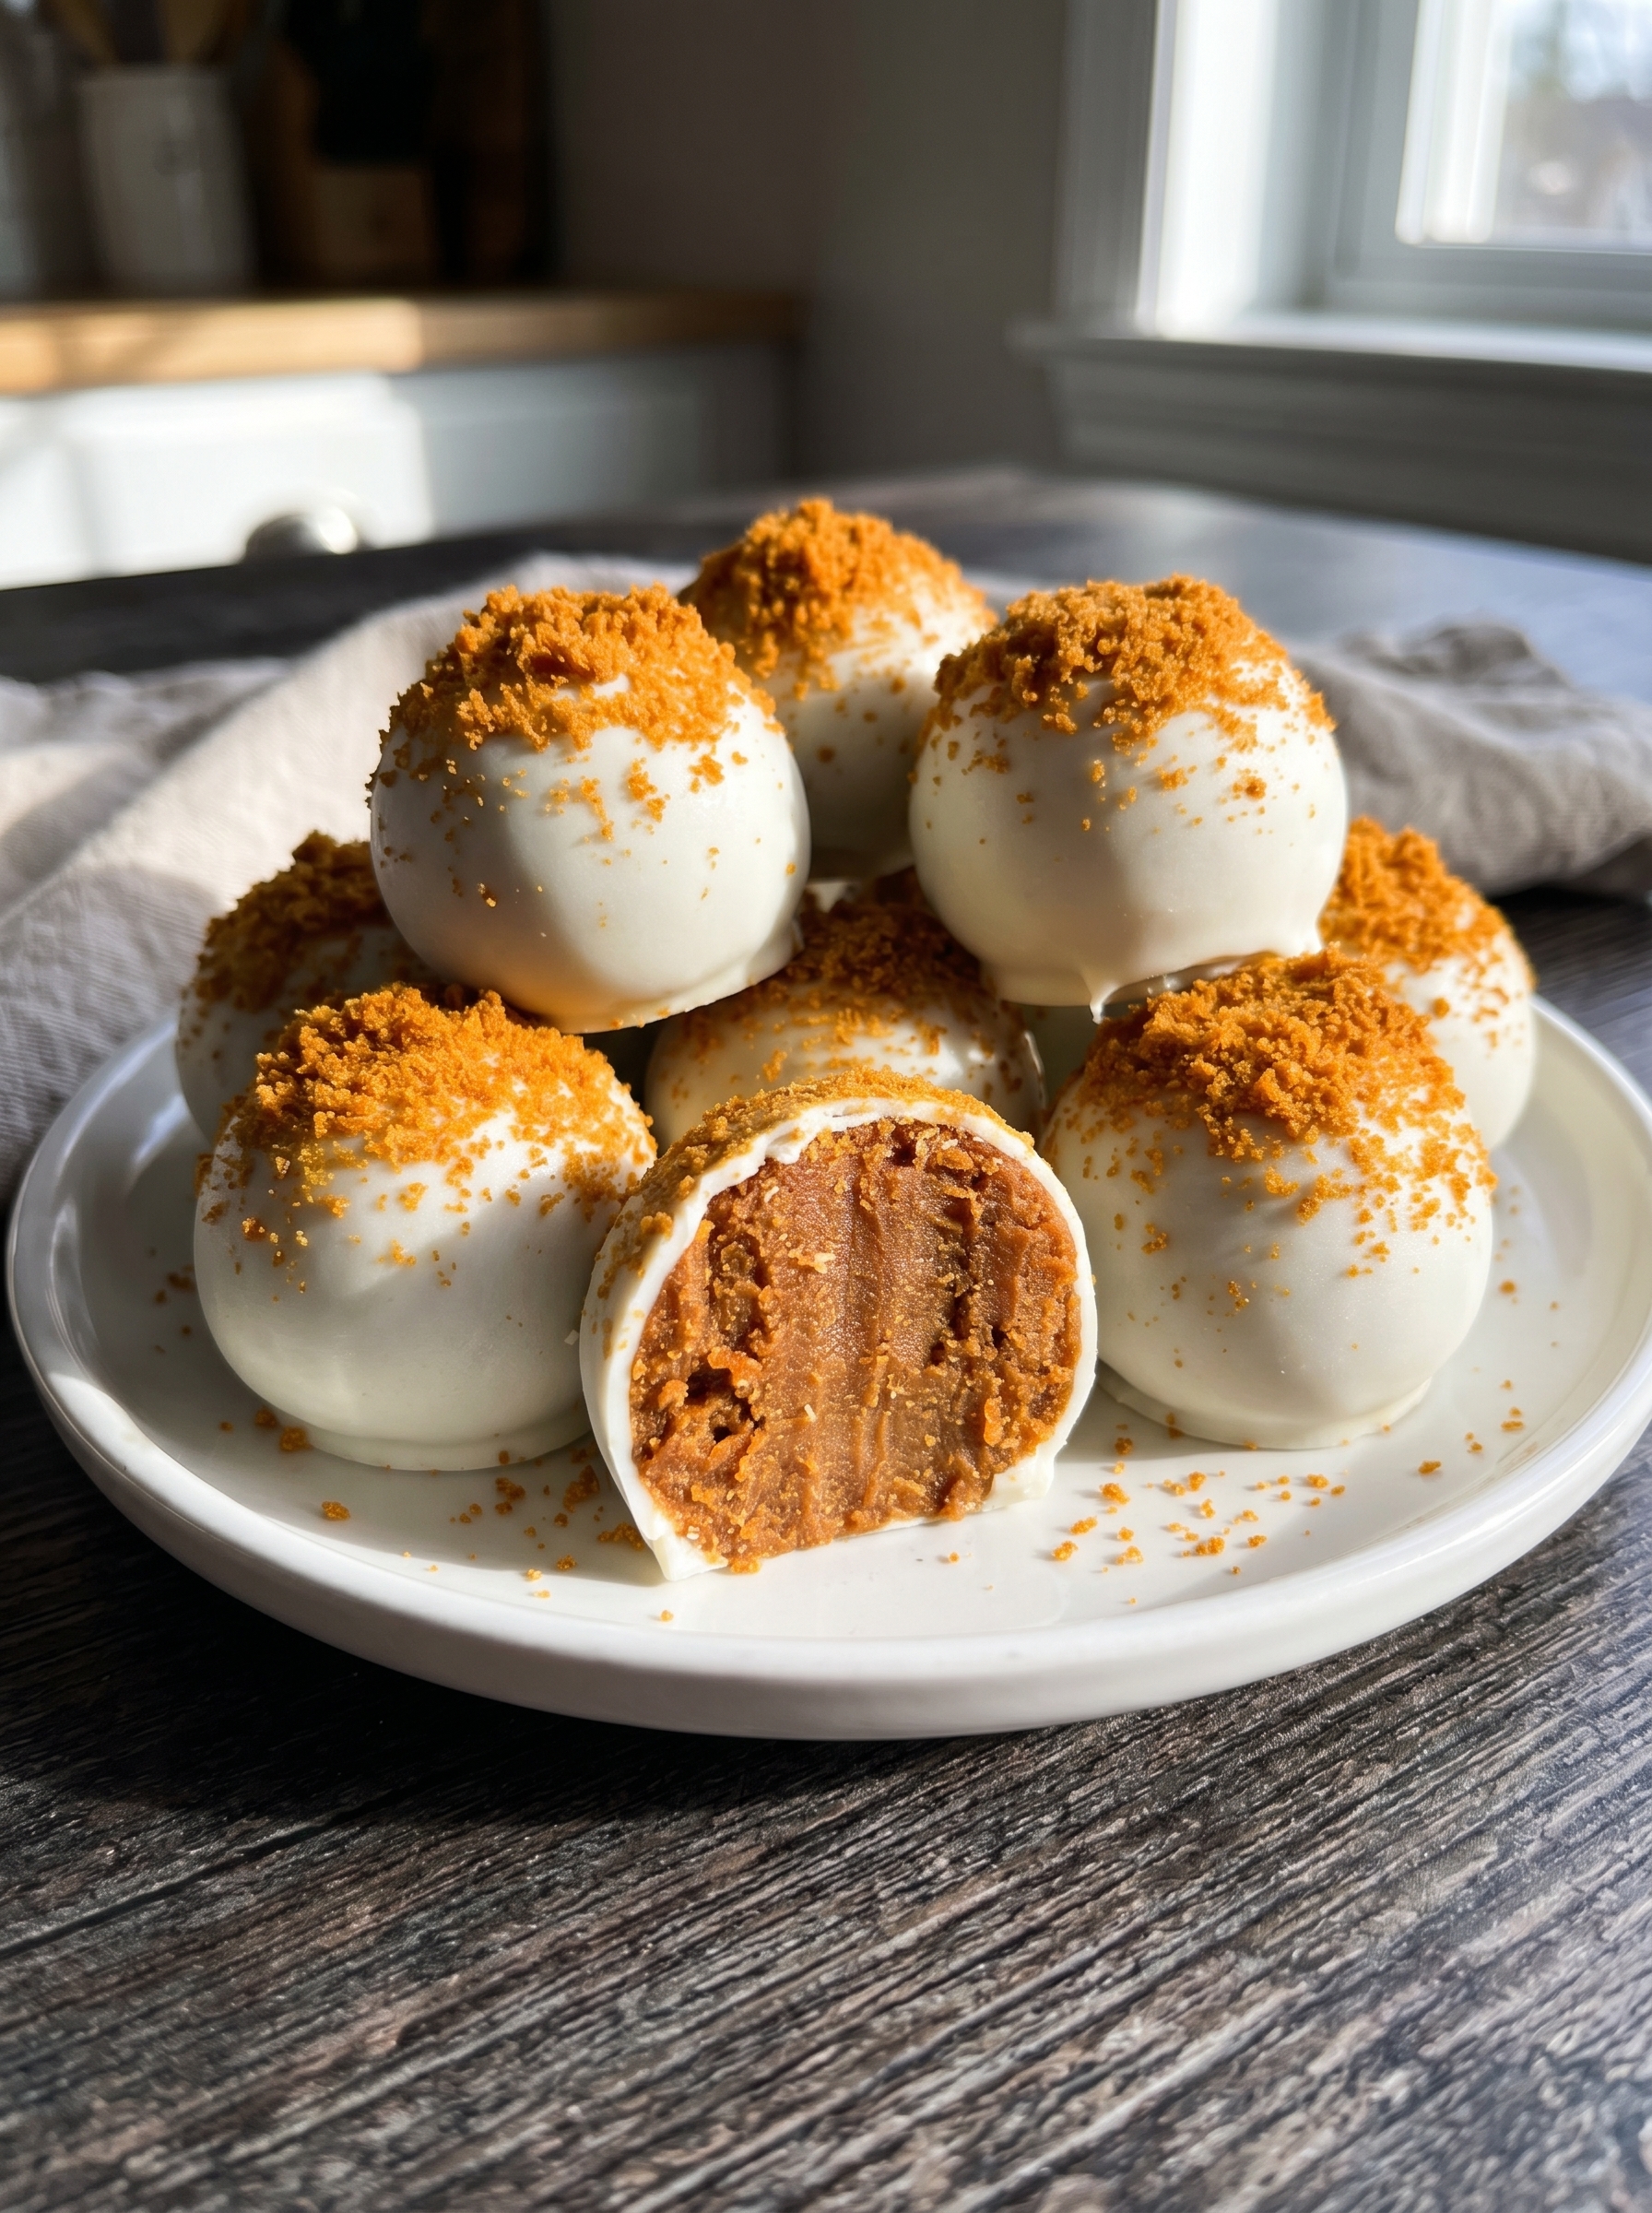
This recipe for No Bake Biscoff Truffles has been a holiday favorite in my kitchen for years. I first discovered the magic of combining crushed Biscoff cookies with cream cheese during a baking-free week when I wanted something festive but fast. The texture is irresistible: a dense, cookie-butter center with a silky vanilla coating that snaps and melts in your mouth. These truffles are the kind of treat that people ask about by name—my family reached for them at every gathering, and I started making multiple batches because they disappear so quickly.
What makes these particularly special is their simplicity. With only three main ingredients and no oven time, they come together in under an hour of active work and then rest in the fridge until you’re ready. The flavor balance—spiced caramelized cookie crumbs and tangy cream cheese, finished with sweet vanilla chocolate—creates a refined candy that still feels homemade. I love making a big tray ahead of time for parties or gifting in boxes to friends during the holidays.
I remember making my first tray for a winter potluck; everyone was surprised to hear there was no baking involved. My niece declared them "the best cookie balls ever," and that moment sealed this as a permanent addition to my holiday repertoire. Over the years I refined chilling times and learned how to get a smooth, shiny coating that resists cracking when brought to room temperature briefly before serving.
My favorite part of this process is the dipping stage: it’s oddly therapeutic to see each ball transform into a glossy little candy. Guests often comment on the texture contrast between the smooth coating and the dense cookie interior. Over time I’ve learned small technique tweaks—like reserving crumbs for topping and ensuring the centers are very cold before dipping—that make a big difference in presentation and shelf life.
Store truffles in a single layer in an airtight container in the refrigerator for up to 2 weeks. If stacking is necessary, separate layers with parchment to prevent sticking. For room-temperature serving, remove the tray from the fridge 20 to 30 minutes before you plan to serve; this softens the center to the perfect bite without cracking the shell. To freeze, flash-freeze the truffles on the baking sheet for 1–2 hours, then transfer to a labeled freezer-safe container; thaw overnight in the refrigerator before serving. Avoid leaving them out longer than 2 hours at room temperature to prevent softening and cracking of the coating.
If Biscoff cookies are unavailable, use speculoos or a similar spiced cookie for related flavor, or substitute graham crackers mixed with a pinch of cinnamon for a milder profile. Cream cheese should be full-fat for best texture; reduced-fat versions can make the centers grainy. For coating, white chocolate or good-quality white candy melts work, but if using white chocolate chips, melt with a teaspoon of neutral oil to improve fluidity. Try peanut butter folded into the dough for a nutty variation—reduce cream cheese by 1 tablespoon to keep firmness.
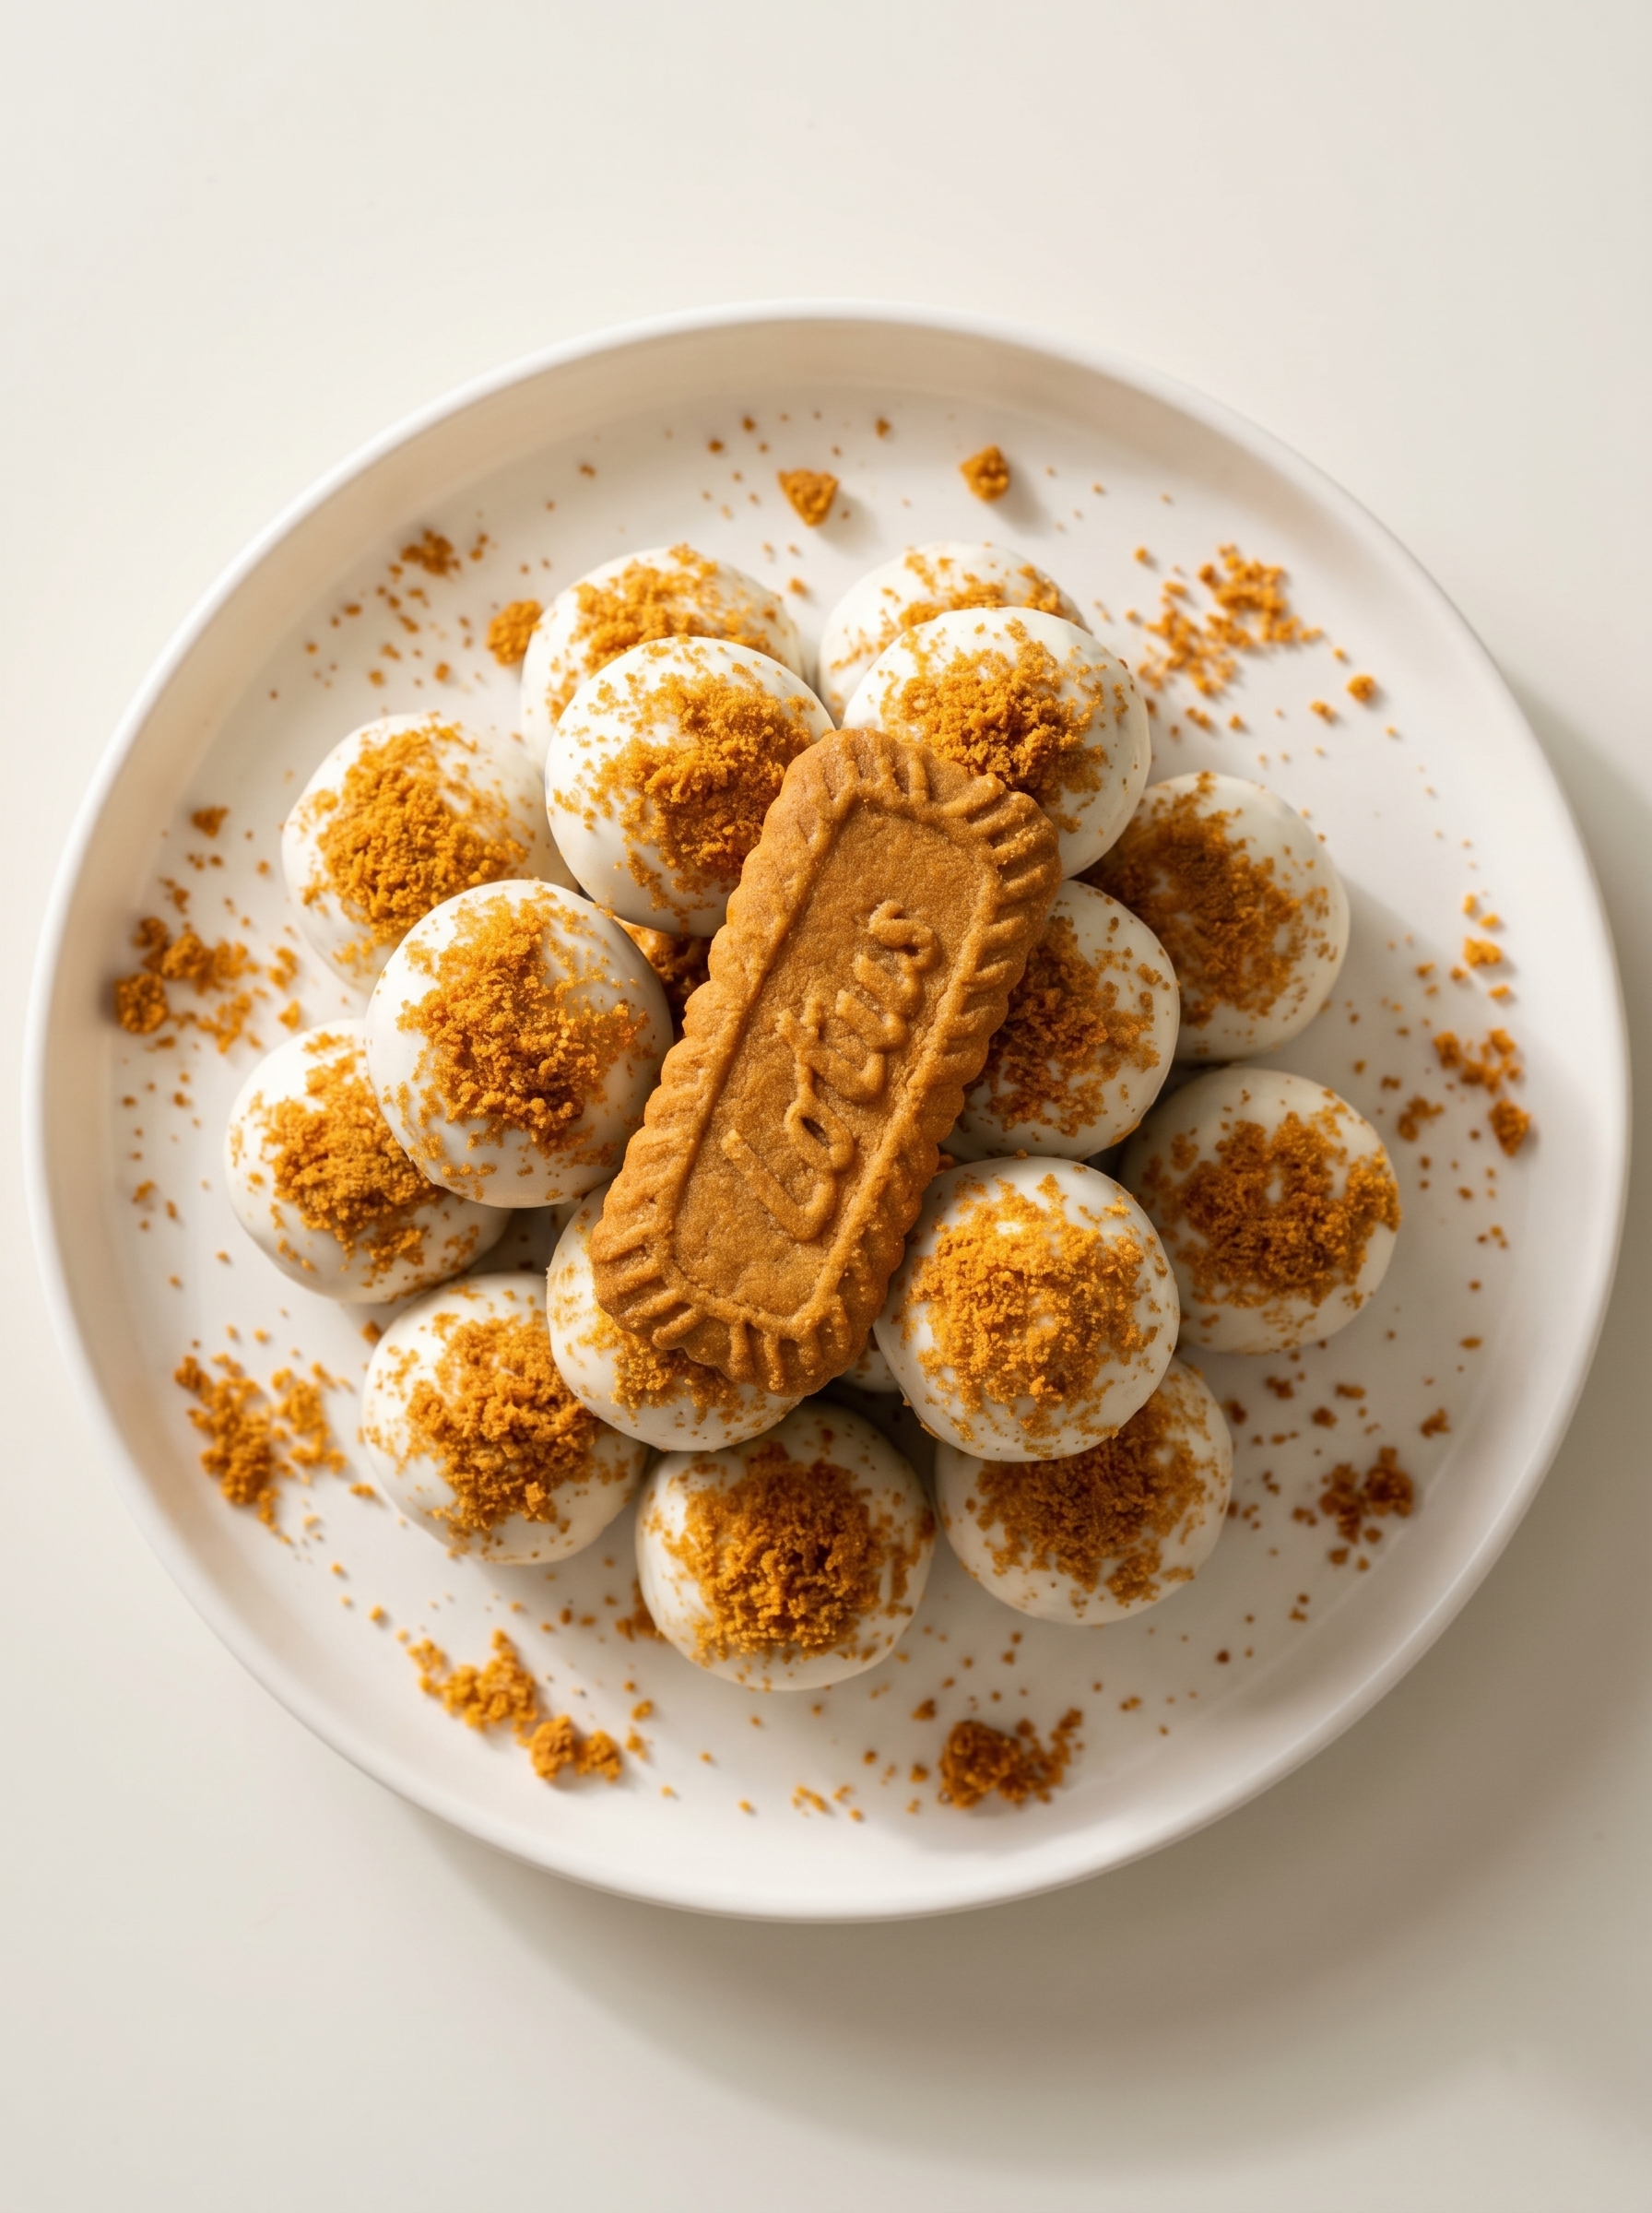
Present these truffles on a decorative platter, scattering extra reserved cookie crumbs and a few whole Biscoff cookies for context. They pair beautifully with coffee, tea, or dessert wine. For holiday gatherings, arrange them in small paper liners like chocolates and tie boxes with ribbon for edible gifts. A finishing dusting of flaky sea salt on the vanilla-coated surface creates a lovely sweet-salty contrast that elevates the experience.
Biscoff cookies originated in Belgium and have become beloved worldwide for their caramelized, spiced profile. Transforming them into truffles is a modern American twist—taking a nostalgic cookie and creating a candy-like, no-bake treat. This approach reflects the trend of turning pantry favorites into simplified confections, similar to how Oreo truffles became a viral classic. The result blends European cookie tradition with American ease and presentation.
In winter, add a pinch of ground nutmeg or a drop of maple extract to the dough for extra warmth; decorate with crushed peppermint for a holiday spin. For spring and summer events, coat in a milk or dark chocolate and top with toasted almond slivers or freeze-dried strawberry dust for bright color. For Fourth of July or other celebrations, drizzle contrasting chocolate over the vanilla coating in red and blue colors or add edible glitter for a festive look.
Prepare the cookie crumb and cream cheese mixture up to 3 days ahead; keep tightly covered in the refrigerator. When ready, scoop, roll, and chill as instructed, then dip just before serving to keep the shells fresh and glossy. For large batches, set up an assembly line: one person scoops and rolls, another melts and dips, and a third sprinkles toppings. Use multiple small bowls of melted coating to avoid cooling and thickening over time.
These truffles are a small, satisfying project that rewards a bit of patience with an elegant homemade sweet. I love handing a small box of them to neighbors during the holidays—it's a tiny, thoughtful gift that always brings a smile.
Make sure the cream cheese is completely softened to room temperature to avoid lumps and to make mixing easier.
Reserve 1/2 cup of the cookie crumbs before combining; sprinkle on each truffle immediately after dipping for visual contrast and texture.
Chill the centers thoroughly before dipping—cold cores reduce cracking and prevent the coating from slipping.
If the coating thickens while you work, warm it gently over the double boiler for a few seconds; avoid overheating to prevent seizing.
Use a 1.5 tablespoon scoop for evenly sized truffles and consistent chilling and coating times.
This nourishing no bake biscoff truffles recipe is sure to be a staple in your kitchen. Enjoy every moist, high protein slice — it is perfect for breakfast or as a wholesome snack any time.
Yes. After the coating sets, flash-freeze on a tray for 1–2 hours, then transfer to a freezer-safe airtight container for up to 3 months. Thaw overnight in the refrigerator.
If you don’t have a food processor, place cookies in a sturdy zip-top bag and crush with a rolling pin until very fine. For melting, use the microwave in short bursts and stir frequently.
This No Bake Biscoff Truffles recipe makes perfectly juicy, tender, and flavorful steak every time! Serve with potatoes and a side salad for an unforgettable dinner in under 30 minutes.
Line a baking sheet with parchment paper so finished truffles can rest directly on it. This prevents sticking and makes transfer simple.
Place both packages of Biscoff cookies in a food processor and pulse to fine crumbs. Reserve 1/2 cup of crumbs for topping. If no processor, crush in a zip-top bag with a rolling pin.
In a large bowl, beat softened cream cheese on medium speed until smooth and creamy, about 1–2 minutes, ensuring no lumps remain.
Add the cookie crumbs to the creamed cheese and mix on medium speed until evenly combined and the mixture resembles a cookie dough.
Use a 1.5 tablespoon scoop to portion the mixture, then roll each portion between palms to form smooth balls and place them on the prepared tray.
Refrigerate the tray of rolled balls for at least 1 hour, up to 2 hours, until the centers are firm for dipping.
Melt the vanilla melting wafers in a double boiler over low heat, stirring every 30 seconds until smooth. Do not overheat to avoid seizing.
Using a dipping fork, submerge each chilled ball in the melted coating, tap to remove excess, place back on parchment, and immediately sprinkle reserved crumbs on top.
Chill the coated truffles in the refrigerator until the coating is set, about 20–30 minutes. Store in an airtight container in the fridge for up to 2 weeks.
Last Step: Please leave a rating and comment letting us know how you liked this recipe! This helps our business to thrive and continue providing free, high-quality recipes for you.
Leave a comment & rating below or tag
@royalrecipe on social media!

Easy homemade thin-crust three-cheese spicy chicken and jalapeño pie — a flavor-packed pizza with a satisfying kick, perfect for pizza night or game day.

A bright, creamy BLT pasta salad tossed with basil pesto, fresh greens, cherry tomatoes, and crisp bacon—perfect for warm-weather gatherings and meal prep.

Tender sautéed shrimp tossed with spaghetti and a creamy sweet-spicy bang bang sauce—ready in under 30 minutes for a weeknight favorite.
Leave a comment & rating below or tag @royalrecipe on social media!
Enjoyed this recipe? Share it with friends and family, and don't forget to leave a review!
This recipe looks amazing! Can't wait to try it.
Comments are stored locally in your browser. Server comments are displayed alongside your local comments.
Join to receive our email series which contains a round-up of some of our quick and easy family favorite recipes.
