
Homemade Milky Ways

Make classic Milky Way–style candy at home with just five ingredients. No baking required — creamy chocolate, fluffy marshmallow center, and a caramel layer, all dipped in chocolate.
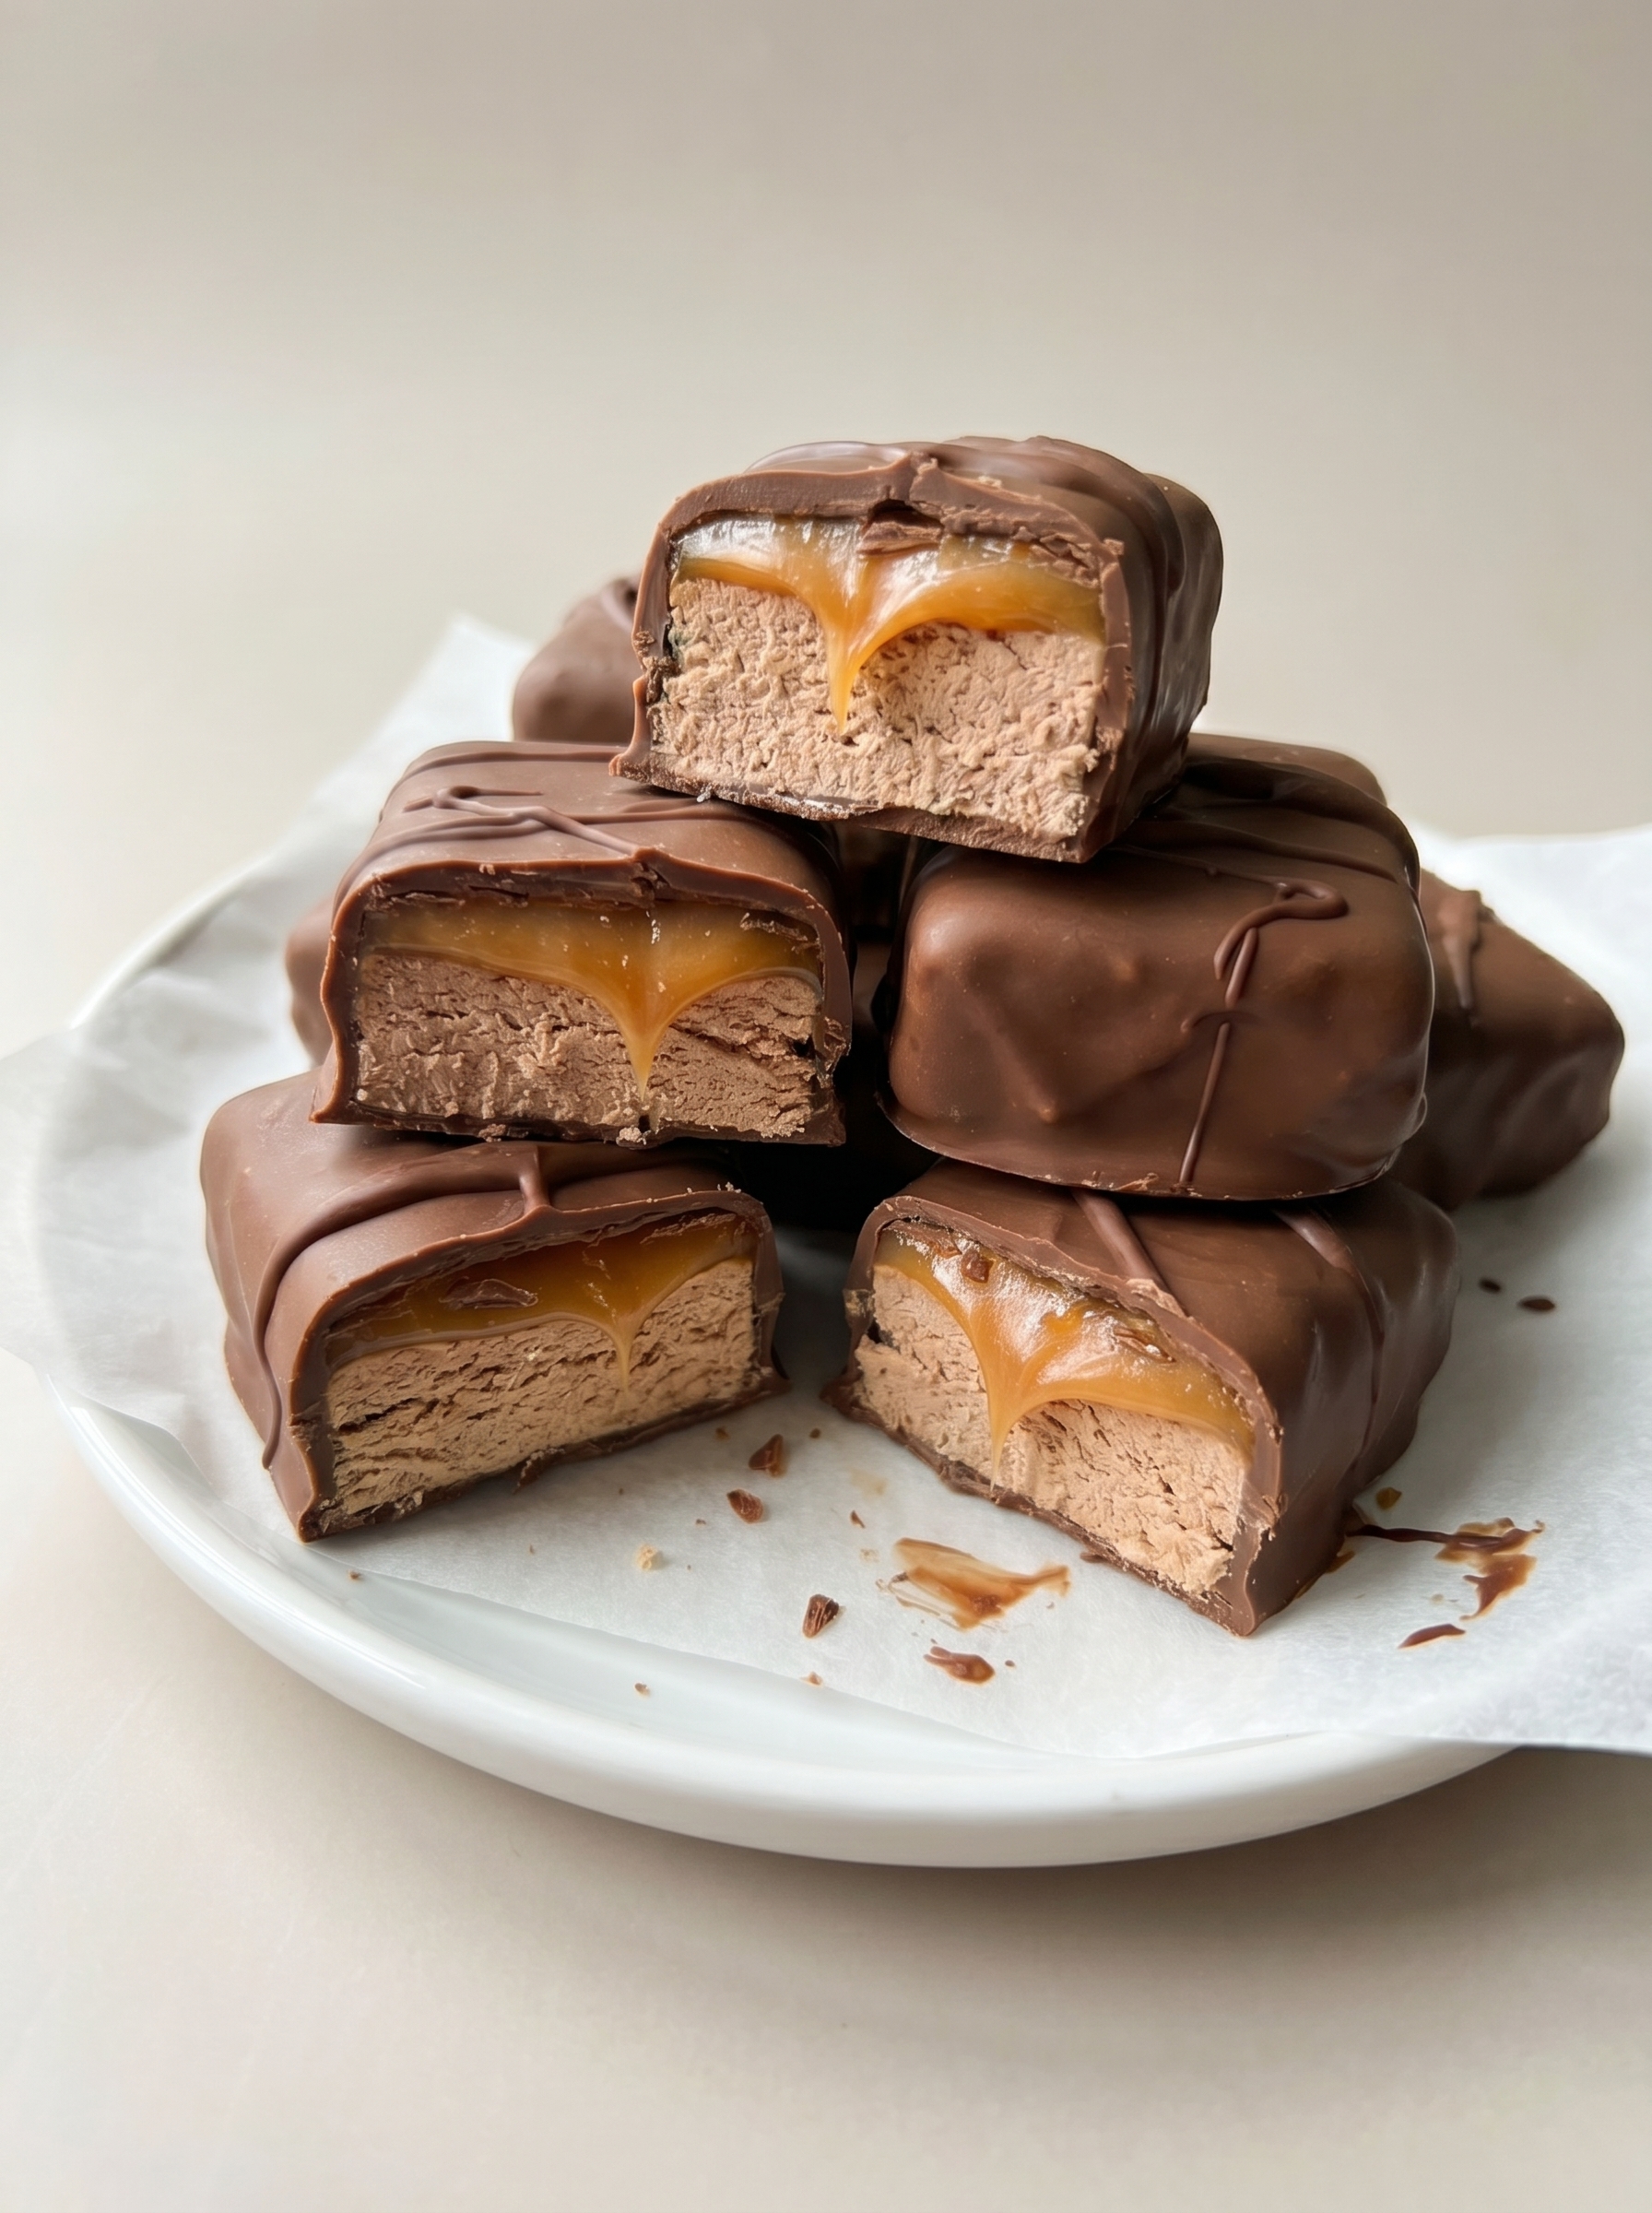
This recipe is my fast track to nostalgia: a no-bake version of the Milky Way bar that I can pull together on a weekday afternoon and still pass off as a weekend treat. I first made this batch during a rainy Saturday when my kids wanted candy but the store run felt pointless. The results were silky chocolate, a pillowy marshmallow middle and a rich, soft caramel layer that tastes like the store version but brighter and fresher. The texture contrast — smooth chocolate, fluffy center, and chewy caramel — is the reason this became a repeat project in our kitchen.
What makes this version special is how few ingredients it needs and how forgiving the process is. There’s no tempering, no complicated equipment, and the microwave makes melting foolproof when you mind the intervals. I often swap the almond bark for high-quality dipping chocolate if I’m serving adults, and the finished bars always disappear faster than I expect. The flavor is creamy, slightly caramel-forward, and the marshmallow adds lift so each bite feels indulgent without being cloying.
Why You'll Love This Recipe
- Made with just five pantry-friendly ingredients: milk chocolate chips, evaporated milk, marshmallow fluff, soft caramels, and dipping chocolate — no special candy-making supplies required.
- No baking, no tempering: everything is melted and assembled in minutes, so you can have candy-ready layers within a half hour of active work time.
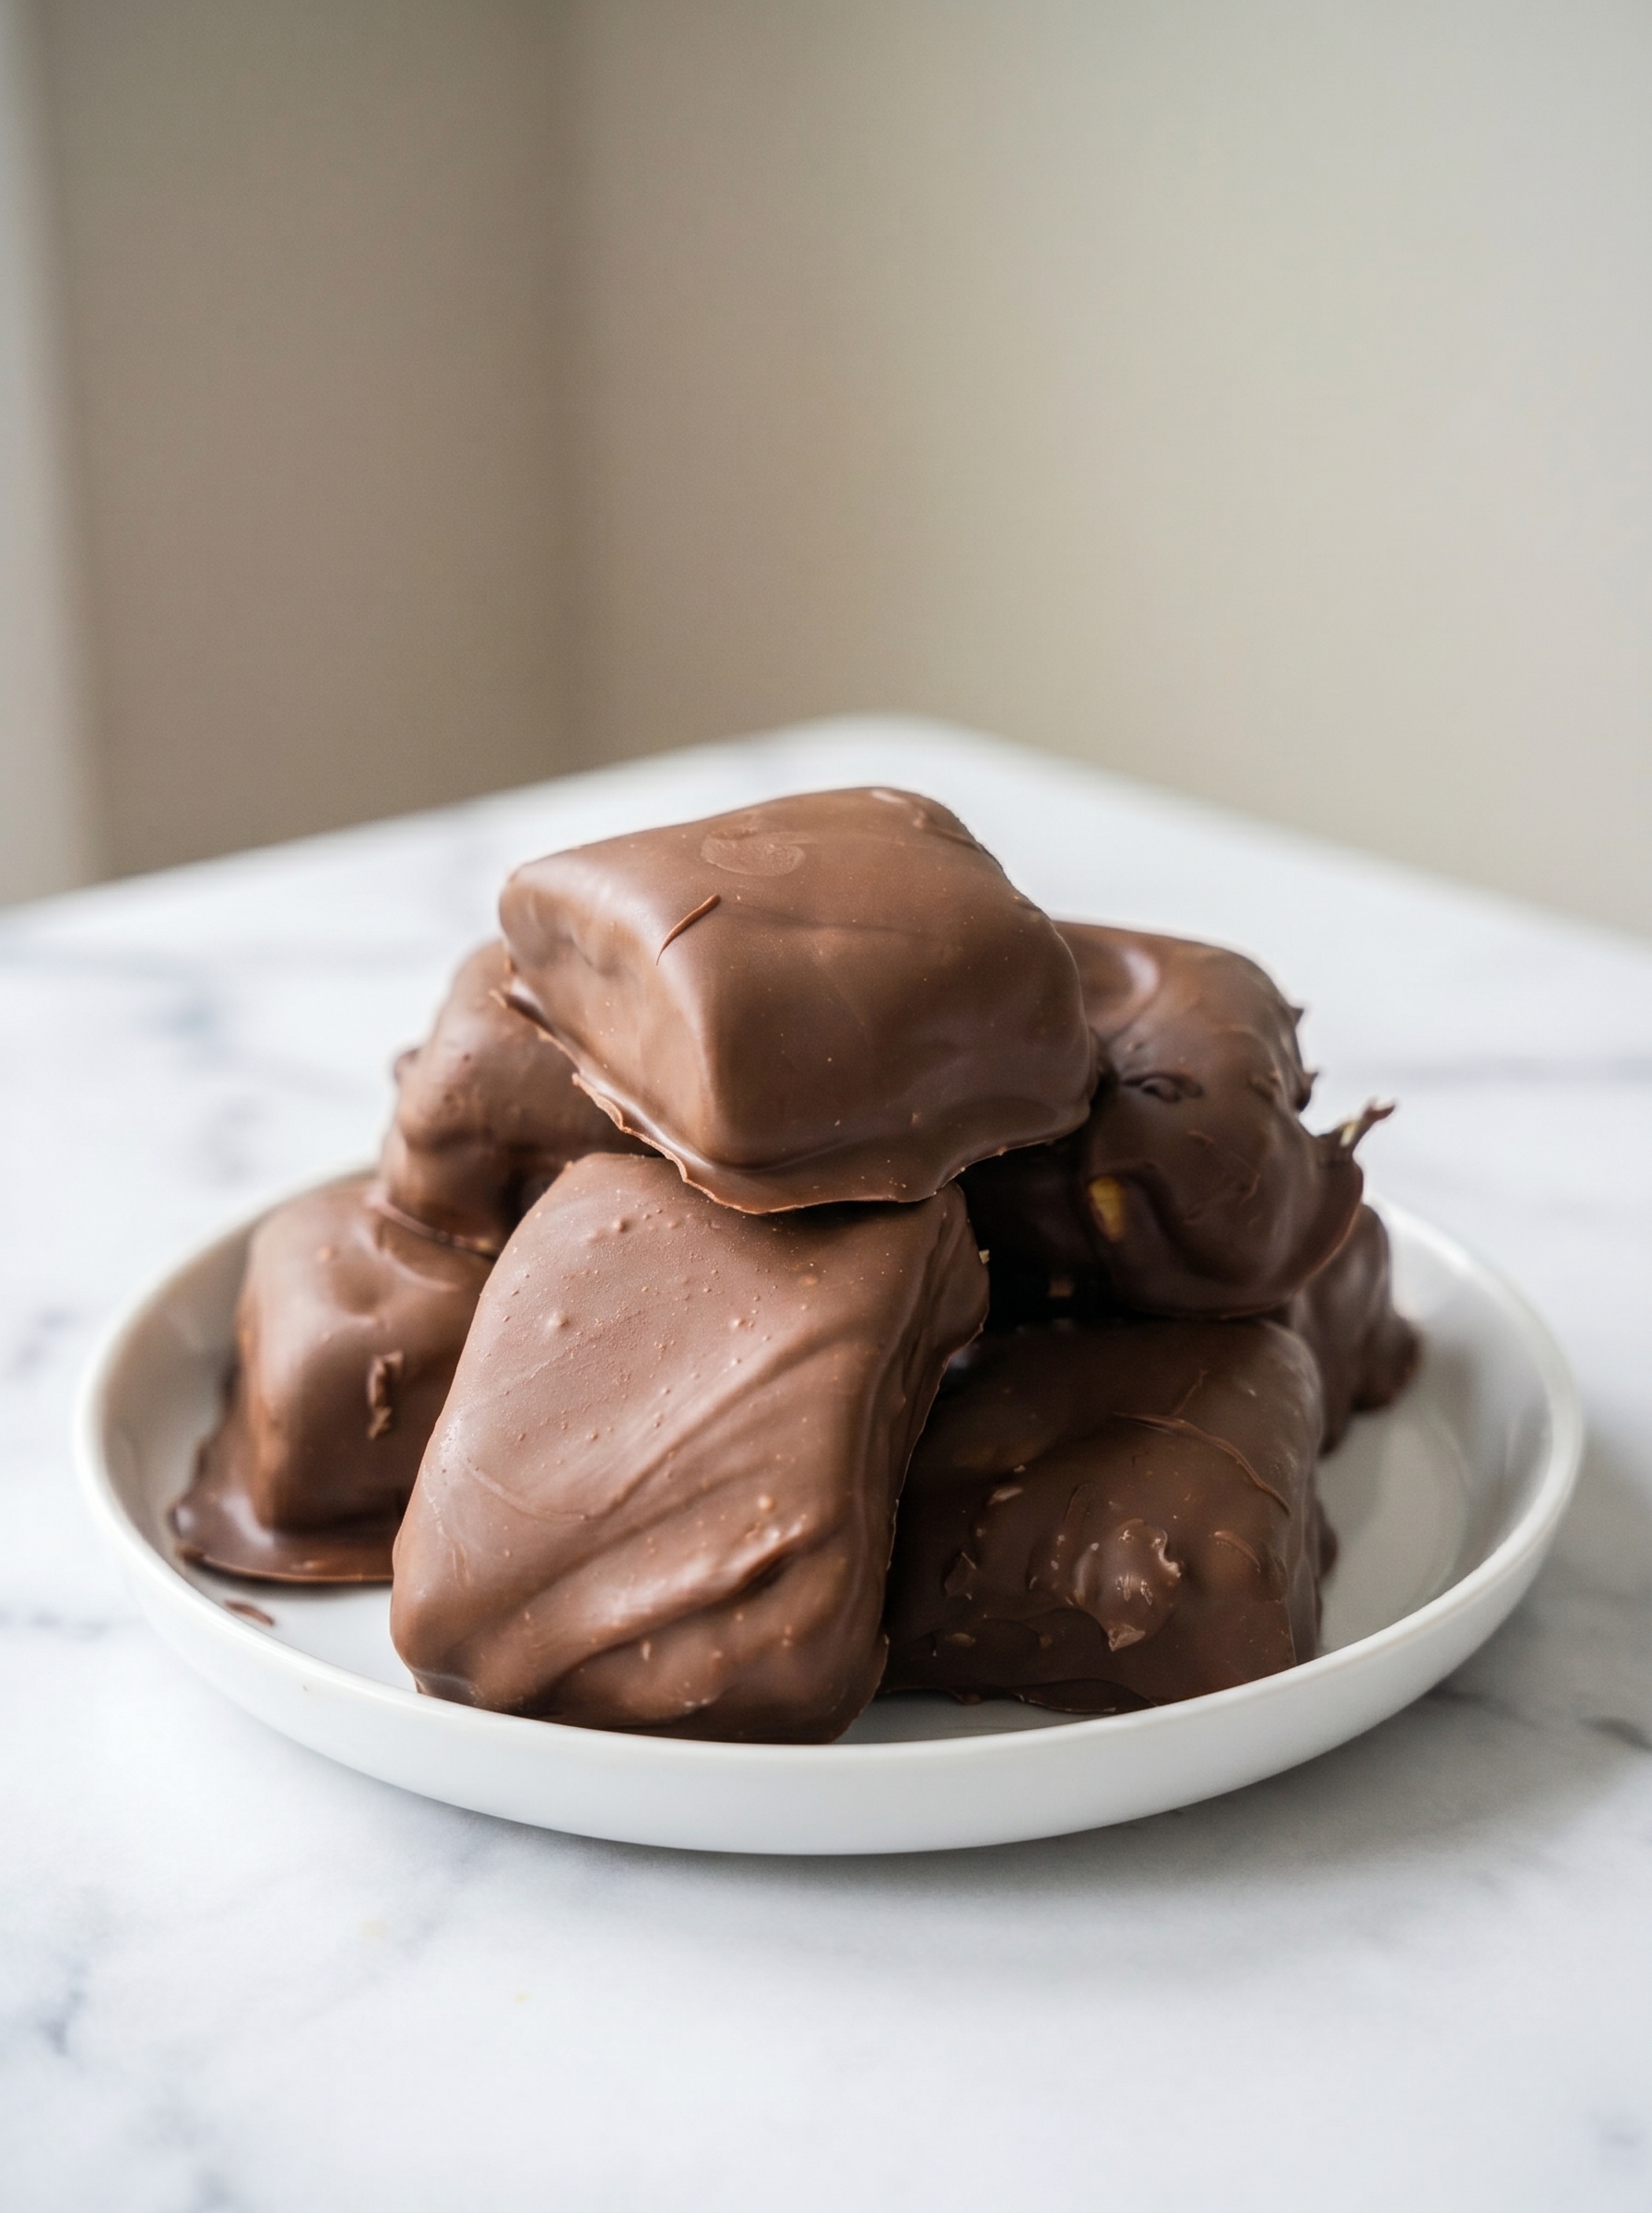
- Perfect for gifts and gatherings: these bars set firm in the fridge and are easy to cut into neat squares for packaging or platters.
- Flexible and forgiving: swap almond bark for high-quality melting chocolate or use dark chocolate for a less sweet finish; the structure holds up beautifully.
- Make-ahead friendly: prepare the layered slab in one session and dip or slice later, giving you great time management for parties or holidays.
- Kid-tested crowd pleaser: my family loved the creamy center and chewy caramel; even picky eaters asked for seconds the first time I made them.
In my experience these are a brilliant treat to make on a lazy afternoon; my neighbor once swapped a jar of homemade jam for a batch of these because they were so addictive. They’re quick enough to whip up after school or in a short break, and they store and travel well if you’re sharing with friends.
Ingredients
- Milk chocolate chips (11.5 oz bag): Choose a quality milk chocolate such as Ghirardelli or Nestlé Toll House for glossy melting and a familiar sweet, milky flavor. Chips are convenient and melt consistently in short bursts.
- Evaporated milk (6 tablespoons, divided): This adds silkiness and helps the chocolate and caramel achieve a smooth, scoopable consistency. I use Carnation evaporated milk — it’s reliable and shelf-stable.
- Marshmallow fluff (7 oz container): Provides the aerated, pillowy center. Fluff blends smoothly into melted chocolate; look for brands labeled 'marshmallow creme' or 'fluff' at your grocery store.
- Caramels (11 oz bag, unwrapped): Use soft caramels that melt evenly. Kraft caramels are a good, affordable option. Unwrap them before melting so they heat uniformly.
- Chocolate almond bark or milk dipping chocolate (1 pound): This is for the outer coating. Almond bark melts easily and sets shiny without tempering; for a more chocolate-forward finish, use good-quality melting wafers or couverture.
Instructions
Step 1 — Melt the chocolate: Place 11.5 ounces milk chocolate chips and 3 tablespoons evaporated milk into a microwave-safe bowl. Microwave on high for 45 seconds, then remove and stir thoroughly. If pieces remain, microwave in 10-second bursts, stirring well after each, until smooth and glossy. The evaporated milk thins the chocolate and gives a creamier mouthfeel; don’t overheat — stirring distributes heat and prevents scorching. Step 2 — Incorporate the marshmallow: Stir in the entire 7-ounce container of marshmallow fluff into the melted chocolate using a silicone spatula. Mix until homogeneous and slightly aerated; this creates the characteristic fluffy center. Work quickly while the chocolate is warm so the fluff blends smoothly rather than clumping. Step 3 — Form the base layer: Line an 8-inch square pan with parchment paper leaving an overhang for easy removal. Pour the chocolate-marshmallow mixture into the pan and spread evenly with an offset spatula to about a 1/2-inch thickness. Tap the pan on the counter to remove air pockets. Refrigerate the pan for at least 15–20 minutes or until firm to the touch while you prepare the caramel layer. Step 4 — Melt the caramel: Combine 11 ounces unwrapped caramels with the remaining 3 tablespoons evaporated milk in a microwave-safe bowl. Heat for 1 minute, whisk, then continue heating in 10-second intervals, stirring between each, until completely melted and silky. If the caramel seems grainy, add a teaspoon of evaporated milk and stir; gentle warmth will help it smooth out. Step 5 — Assemble layers: Pour the warm caramel over the chilled chocolate-marshmallow layer and smooth to the edges. Return the pan to the refrigerator and chill until fully set — although much of the active work is short, allow at least 4 hours for best firmness and easier cutting. The cold helps the layers separate cleanly when sliced. Step 6 — Slice into pieces: Use the parchment overhang to lift the set slab onto a cutting board. Using a sharp knife warmed under hot water and wiped dry between cuts, slice into 16 squares. Warming the knife gives cleaner edges without squashing the caramel. Step 7 — Melt the coating: Melt 1 pound of almond bark or milk dipping chocolate in a microwave-safe bowl in 30-second bursts, stirring between each, until smooth. Almond bark is forgiving and sets shiny; if using real chocolate, avoid overheating by stirring every 15–20 seconds once nearly melted. Step 8 — Dip and set: Using two forks, dip each square into the melted coating, letting excess drip back into the bowl. Place on a parchment-lined baking sheet to set. Chill briefly if you want a quicker set, about 10–15 minutes, or leave at room temperature if the kitchen is cool. Store in an airtight container once fully set.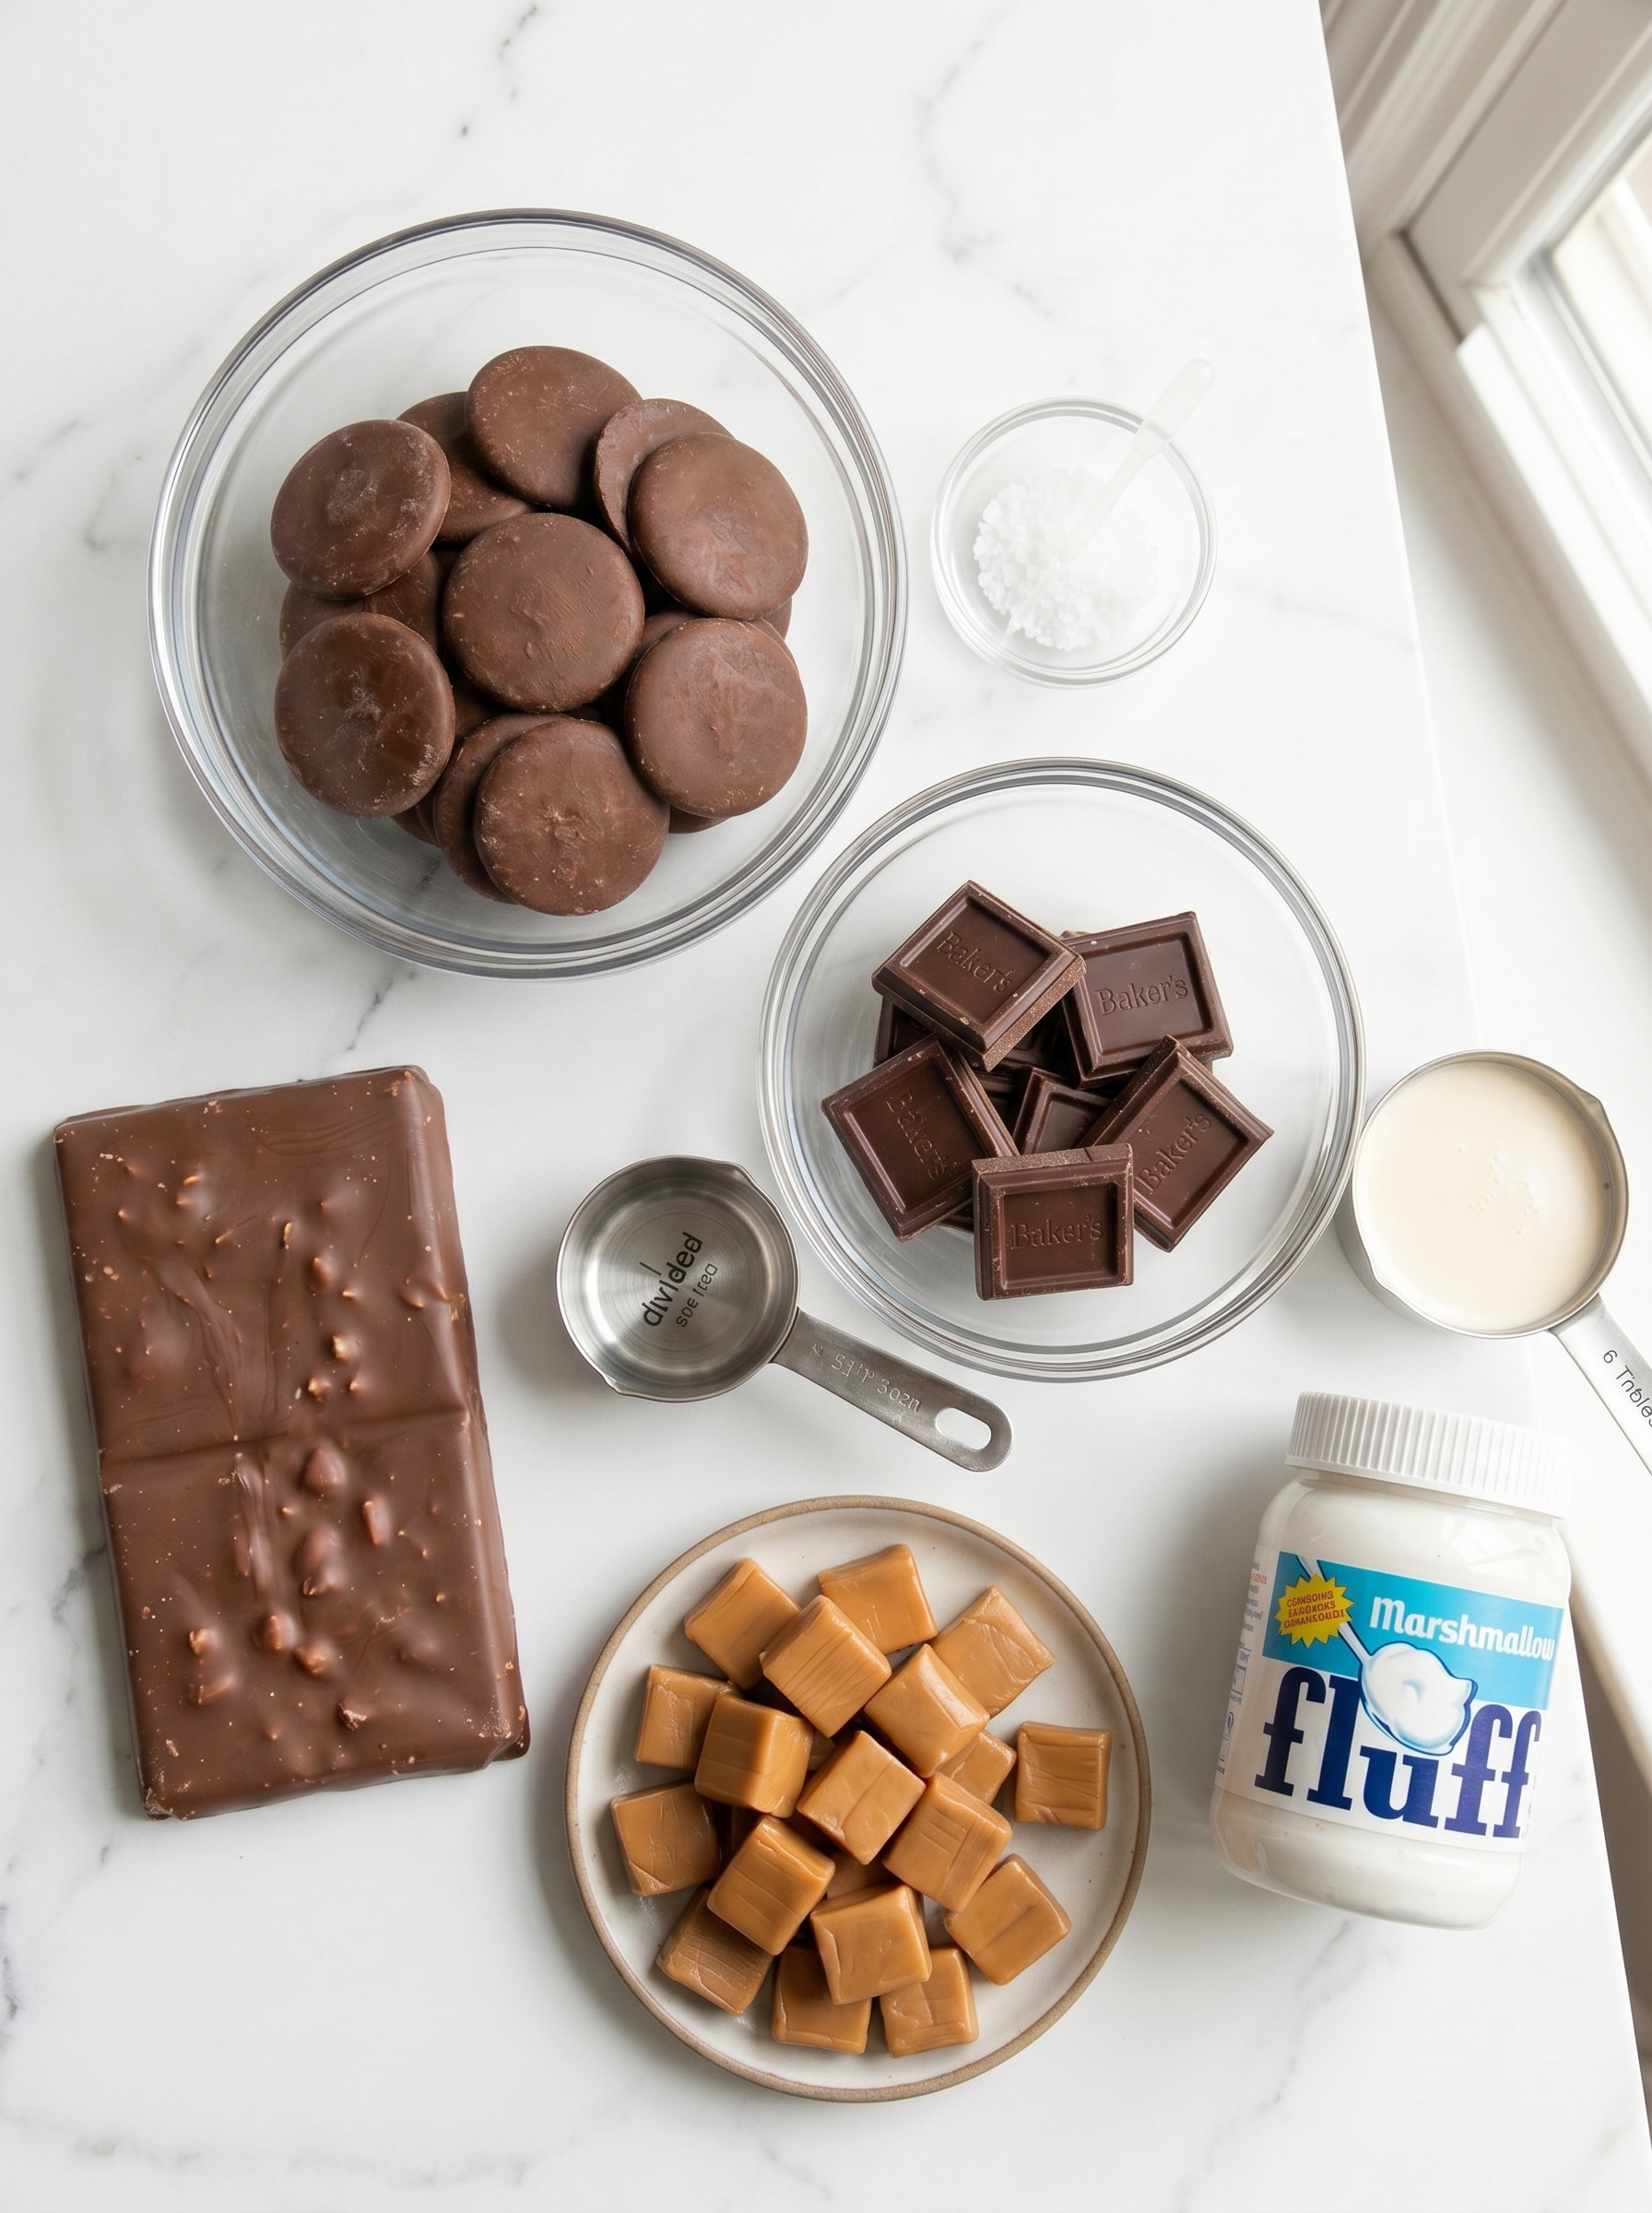
You Must Know
- These keep well in an airtight container in the refrigerator for up to 2 weeks; they also freeze well for up to 3 months — thaw in the fridge overnight before serving.
- Active prep is about 30 minutes, but set time in the refrigerator requires at least 4 hours for the best texture and clean slicing.
- This version contains dairy and is not vegan; marshmallow fluff is generally egg-white based and not classified as dairy-free.
- For cleaner cuts, warm your knife under hot water between slices and dry it; chilled bars cut much more neatly than room-temperature ones.
My favorite thing about these is their giftability — I once wrapped a batch for a teacher with a handwritten label, and she told me she’d never tasted a homemade version so close to the store-bought classic. The contrast of fluffy center and chewy caramel always gets compliments. This recipe taught me how small technique tweaks — like warming the knife or chilling the slab for longer — transform a homemade bar into something professional.
Storage Tips
Store pieces in a single layer or separated by parchment to prevent sticking. Keep them in an airtight container in the refrigerator to maintain firmness; if your home is warm, refrigeration prevents the coating from softening. For longer storage, freeze in a sealed container for up to three months — place wax paper between layers to avoid sticking. When ready to serve, move them to the refrigerator for a few hours, then allow 10–15 minutes at room temperature for the best eating texture.
Ingredient Substitutions
If you prefer a slightly less sweet bar, swap the milk chocolate chips for semi-sweet or a mix of milk and dark chocolate. For the coating, couverture or high-quality melting wafers yield a richer finish; for a vegan version, use vegan marshmallow cream and dairy-free chocolate alternatives, though the result will differ from the dairy original. If you can’t find almond bark, use 12 ounces of finely chopped dipping chocolate and 2 tablespoons coconut oil to help it set smoothly.
Serving Suggestions
Serve chilled or just slightly below room temperature to highlight the layers. Pair slices with a strong coffee or espresso to balance sweetness, or present on a dessert board with nuts and dried fruit for contrast. Garnish with a light dusting of cocoa powder or a drizzle of melted dark chocolate for visual appeal. Smaller bite-sized pieces work beautifully for parties and are easier to eat by hand.
Cultural Background
Milky Way style bars are an American confection created as a caramel-and-nougat treat coated in chocolate. This homemade adaptation borrows from that tradition, replacing dense nougat with marshmallow fluff for a lighter texture while preserving the cherished caramel-and-chocolate interplay. Candy bars evolved through 20th-century innovation in mass candy production, and recreating them at home connects modern cooks to that heritage while allowing personalization.
Seasonal Adaptations
For holidays, press a thin layer of crushed peppermint into the top of the coating while it’s tacky for a festive twist. In summer, use dark chocolate coating to avoid too-sweet flavors; in autumn, stir a pinch of flaky sea salt into the caramel for a salted-caramel bar. For a tropical spin, add a teaspoon of toasted coconut flakes to the top before the coating sets.
Meal Prep Tips
Make the layered slab ahead and keep it refrigerated; you can dip and finish or slice and dip in a separate session. Prepare an assembly line for dipping: set up melted coating, a tray of cut squares, and a wire rack or parchment-lined sheet for setting. If you’re giving them as gifts, package chilled bars in small boxes with parchment and a cold pack to keep them firm during transport.
These bars are simple to make, delicious to share, and adaptable to many tastes. Try one batch and you’ll have a new go-to for gifts, parties, or a personal sweet fix — they’re consistently the most requested homemade candy in our house.
Pro Tips
Warm your knife under hot water and dry it between cuts for clean, precise slices through the chilled slab.
Use parchment paper with an overhang to lift the set bars cleanly from the pan without breaking layers.
If caramel becomes grainy, add 1 teaspoon evaporated milk and stir over low heat or short microwave bursts until smooth.
Chill the slab thoroughly before cutting to prevent squashing the caramel layer.
This nourishing homemade milky ways recipe is sure to be a staple in your kitchen. Enjoy every moist, high protein slice — it is perfect for breakfast or as a wholesome snack any time.
FAQs about Recipes
How long do Homemade Milky Ways keep?
Yes. After slicing and dipping, store pieces in an airtight container in the refrigerator for up to two weeks, or freeze for up to three months.
Can I melt the chocolate without a microwave?
Yes — for smoother melting, microwave in short intervals and stir well between each. Alternatively, use a double boiler and stir until glossy.
Tags
Homemade Milky Ways
This Homemade Milky Ways recipe makes perfectly juicy, tender, and flavorful steak every time! Serve with potatoes and a side salad for an unforgettable dinner in under 30 minutes.
Ingredients
Chocolate Layer
Caramel Layer
Coating
Instructions
Melt the chocolate
Place 11.5 ounces milk chocolate chips and 3 tablespoons evaporated milk into a microwave-safe bowl. Microwave 45 seconds, stir, then heat in 10-second bursts until smooth. Stir thoroughly to ensure a glossy, lump-free melt.
Combine with marshmallow
Stir in the 7-ounce marshmallow fluff until fully combined and slightly aerated, creating a pillowy, spreadable center.
Form base layer
Pour mixture into an 8-inch square pan lined with parchment and smooth evenly. Refrigerate 15–20 minutes to set while you prepare the caramel.
Melt caramels
Combine 11 ounces unwrapped caramels with 3 tablespoons evaporated milk in a microwave-safe bowl; heat 1 minute, stir, then use 10-second intervals until smooth.
Assemble layers
Pour melted caramel over the chilled chocolate-marshmallow base and smooth. Refrigerate at least 4 hours until firm for easiest slicing.
Cut into squares
Lift the set slab using parchment, place on a cutting board, and slice into 16 squares using a warmed knife for clean edges.
Dip in coating
Melt 1 pound almond bark or dipping chocolate and use two forks to dip each square, letting excess drip before transferring to parchment to set.
Set and store
Allow coating to firm at room temperature or briefly in the fridge. Store in an airtight container in the refrigerator for up to two weeks or freeze for up to three months.
Last Step: Please leave a rating and comment letting us know how you liked this recipe! This helps our business to thrive and continue providing free, high-quality recipes for you.
Nutrition
Did You Make This?
Leave a comment & rating below or tag
@royalrecipe on social media!
Categories:
You might also like...

Spicy Chicken and Jalapeño Thin Crust Pizza
Easy homemade thin-crust three-cheese spicy chicken and jalapeño pie — a flavor-packed pizza with a satisfying kick, perfect for pizza night or game day.

Creamy Pesto BLT Pasta Salad
A bright, creamy BLT pasta salad tossed with basil pesto, fresh greens, cherry tomatoes, and crisp bacon—perfect for warm-weather gatherings and meal prep.

Bang Bang Shrimp Pasta
Tender sautéed shrimp tossed with spaghetti and a creamy sweet-spicy bang bang sauce—ready in under 30 minutes for a weeknight favorite.
Did You Make This?
Leave a comment & rating below or tag @royalrecipe on social media!
Rate This Recipe
Share This Recipe
Enjoyed this recipe? Share it with friends and family, and don't forget to leave a review!
Comments (1)
This recipe looks amazing! Can't wait to try it.
Comments are stored locally in your browser. Server comments are displayed alongside your local comments.
Hi, I'm Amara!
What's Popular

30-Minute Meals!
Join to receive our email series which contains a round-up of some of our quick and easy family favorite recipes.