
Homemade Milk Chocolate

Easy four-ingredient milk chocolate you can make at home with simple pantry staples—smooth, sweet, and gluten-free. Ready with 30 minutes active time and a short chill.
This homemade milk chocolate has been my lazy-afternoon treat for years — a small project that always rewards with rich aroma and honest comfort. I remember the first time I tried making chocolate at home: it was a rainy Saturday and the store shelves were oddly bare. I rummaged through the pantry, found cocoa butter, powdered milk, cocoa powder, and confectioners' sugar, and decided to try. The result wasn’t identical to a major brand bar, but it had warmth, a distinct cocoa butter mouthfeel, and a sweetness that felt nostalgic. Since then, I’ve made this batch for small gifts, kids’ cooking sessions, and quiet nights when I want something homemade without a long list of ingredients.
What makes this version special is its simplicity and honesty. With only four primary ingredients and minimal equipment, you control sweetness and texture. It’s a forgiving technique that teaches you about tempering by feel rather than formal chocolate tempering curves. Expect a tender snap if you allow it to set properly in the refrigerator, and a slightly more rustic texture than ultra-refined commercial bars — which I love. It’s a perfect weekend project, a quick edible gift, or a way to customize flavors by adding a pinch of sea salt, vanilla, or toasted nuts.
Why You'll Love This Recipe
- Made with just four pantry staples: cocoa butter (or coconut oil), powdered milk, unsweetened cocoa, and powdered sugar — easy to source and store.
- Quick active time: about 30 minutes of hands-on work and about 1 hour of cooling — perfect for an afternoon activity or a same-day gift.
- Customize sweetness instantly: add less sugar, swap for a sugar substitute, or fold in flavors like vanilla, espresso, or citrus zest for unique spins.
- Gluten-free by nature and suitable for a variety of diets if you use coconut oil and a sugar substitute — simple swaps available.
- Low-equipment: a small pot, a heatproof bowl, a spatula, and molds (or an ice cube tray) are all you need — great for small kitchens.
My family reacts to this chocolate the way we do to most homemade things — delighted by the intention and generous with praise. One time I made a double batch for a neighborhood cookie swap and people asked for the recipe on the spot. For kids, it’s a magical process: liquid turns into a bar. For adults, it’s a satisfying reminder that good things don’t always need complicated techniques.
Ingredients
- Cocoa butter or coconut oil (1/2 cup): Cocoa butter gives the most authentic mouthfeel and snap; substitute refined coconut oil for a milder flavor. Look for food-grade cocoa butter from reputable brands or refined coconut oil if you prefer no coconut taste.
- Whole milk powder (3 tablespoons): This is the ingredient that turns dark chocolate into milk chocolate. Use full-fat milk powder like Nestlé or local dairy brands for creaminess; instant milk powder works fine and dissolves more readily.
- Unsweetened cocoa powder (1/3 cup): Dutch-processed gives a mellower, darker chocolate while natural cocoa is brighter and slightly more acidic. Choose a quality cocoa (e.g., Valrhona, Ghirardelli, or a trusted supermarket brand) and sift to avoid lumps.
- Powdered sugar (3/4 cup): Confectioners’ sugar ensures the sweetener blends smoothly into the fat. If you want less sweetness, reduce to 1/2 cup; for sugar-free, use a powdered sugar substitute measured to taste.
- Optional flavor add-ins: A pinch of fine sea salt, 1/2 teaspoon vanilla extract, or 1/2 teaspoon instant espresso powder can deepen flavor. Toasted chopped nuts or mini toffee bits can be sprinkled into molds.
Instructions
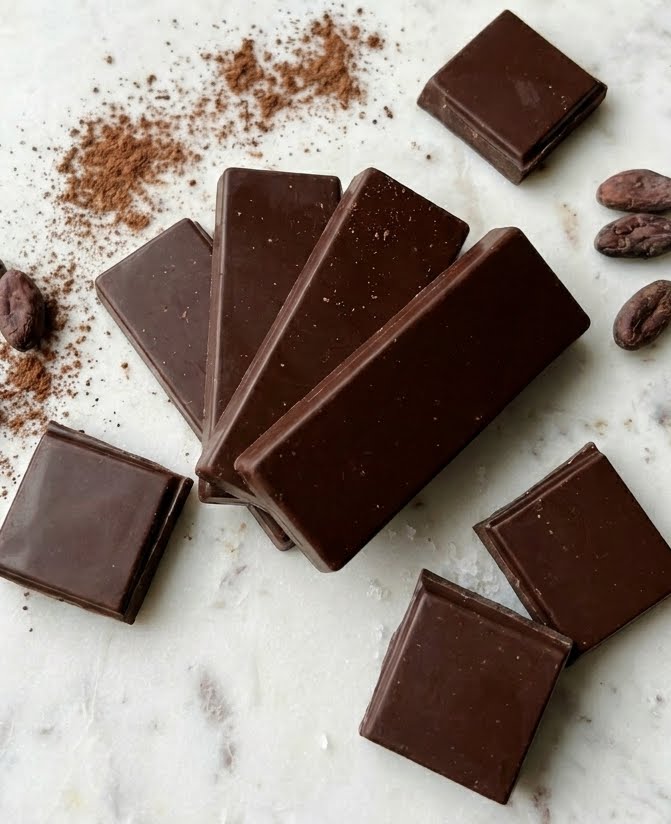
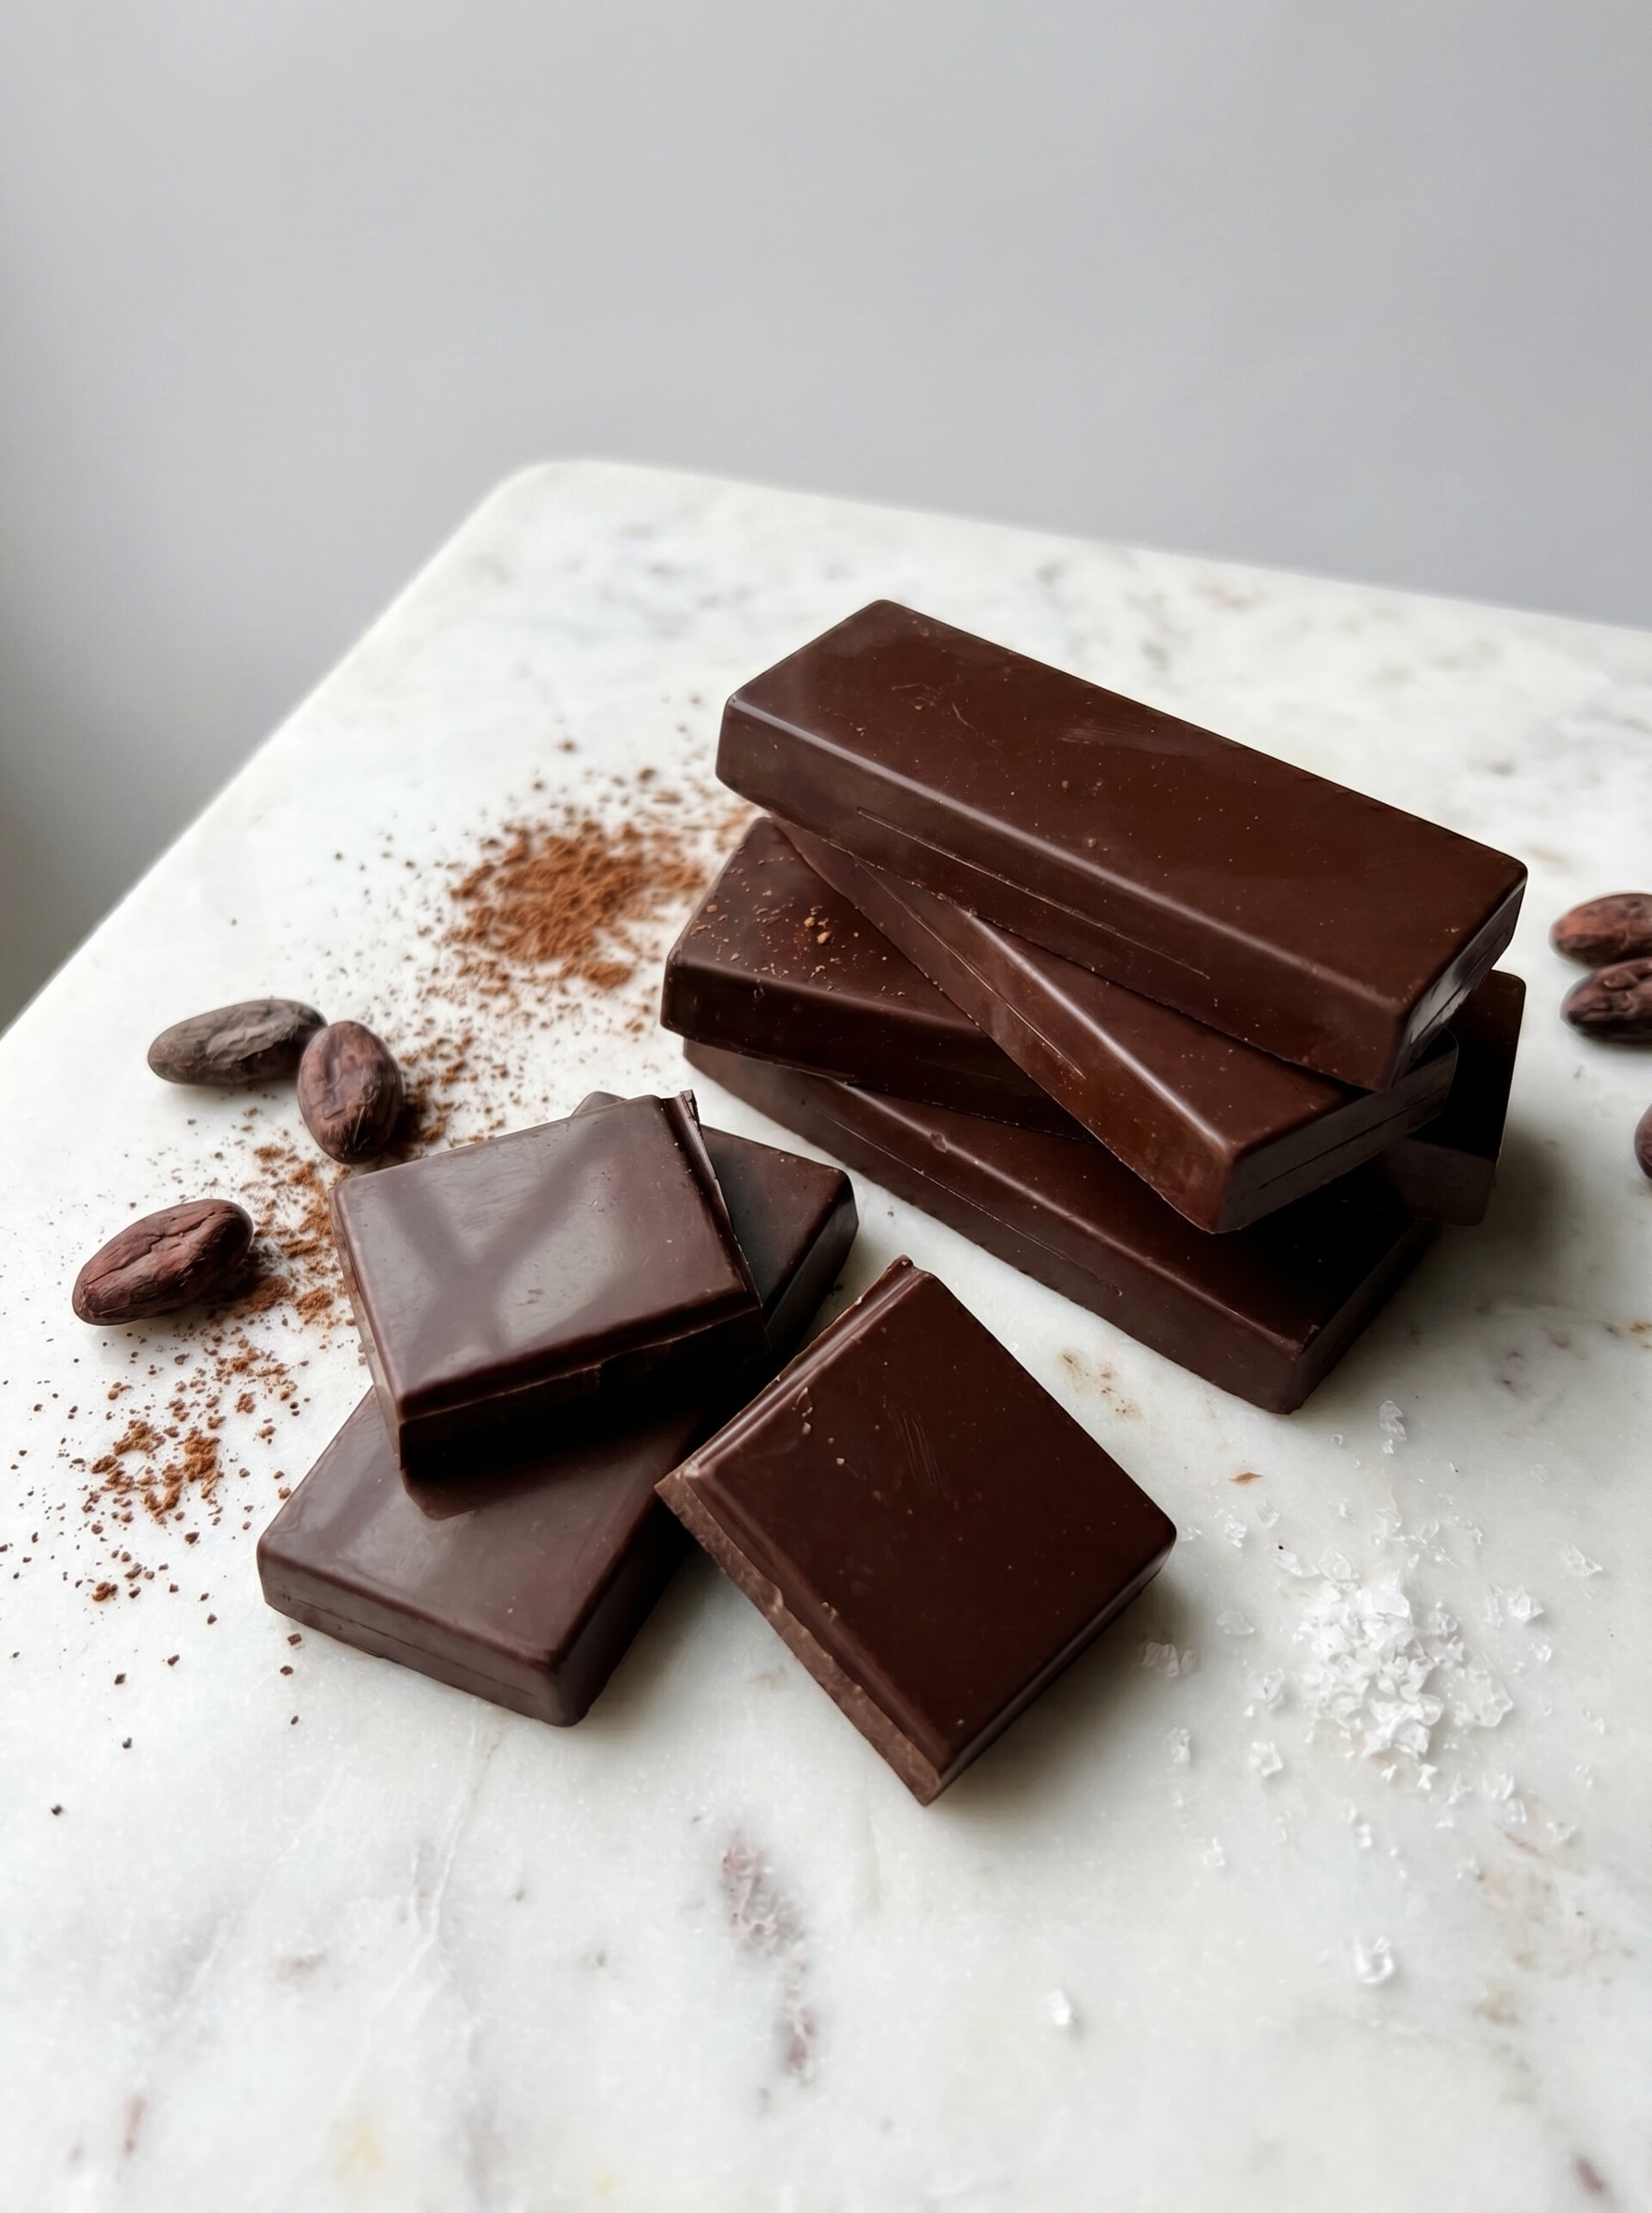
Prepare dry ingredients: Sift the unsweetened cocoa powder and powdered sugar separately into a small bowl to remove lumps. Sifting makes incorporation quicker and reduces the chance of gritty pockets. Measure the milk powder and whisk it with the sifted cocoa to ensure an even distribution before it ever meets the melted fat. Set up a gentle double-boiler: Fill a small pot about one-third full with water and bring to a gentle simmer (medium-high heat). Use a heatproof bowl that sits on the pot rim without touching the water. This indirect heat melts the cocoa butter gently; avoid direct flame to prevent scorching. Melt the fat: Add the cocoa butter or coconut oil (1/2 cup) to the bowl and stir occasionally as it melts. Watch for clear, pale liquid; this usually takes 4–6 minutes depending on bowl size. If using cocoa butter, small solid lumps will melt cleanly and leave a satin texture. Incorporate cocoa and milk powders: Lower the heat to medium-low. Whisk in the sifted cocoa powder (1/3 cup) in two additions to prevent clumping. Once fully combined, whisk in the milk powder (3 tablespoons) until dissolved and homogeneous. These powders hydrate into the fat; patience and steady stirring are the keys to a smooth emulsion. Sweeten gradually: Add the powdered sugar (3/4 cup) in thirds, stirring thoroughly after each addition. Taste as you go. If you prefer a less-sweet bar, stop at 1/2 cup. If using a sugar substitute, use the powdered form for smoother integration. Continue stirring until the mixture appears glossy and smooth. Finish off-heat: When all ingredients are combined, remove the bowl from heat but keep stirring for about 5 minutes — residual heat helps further combine the mixture and reduce grittiness. Set the bowl on a hot pad and stir for another 5 minutes off the pot to let any tiny air bubbles dissipate. Pour and chill: Pour the chocolate into molds or an ice cube tray. Tap the mold lightly on the counter to release trapped air. Let the chocolate sit at room temperature for 30 minutes, then transfer to the refrigerator for 30 minutes to fully set. Avoid freezing — quick freezing can change texture. Unmold and enjoy: Once set, invert molds to release bars. Expect a slightly rustic texture; a quick bite will reveal the smooth cocoa butter and milk powder creaminess. Store in an airtight container in the fridge or a cool, dry place.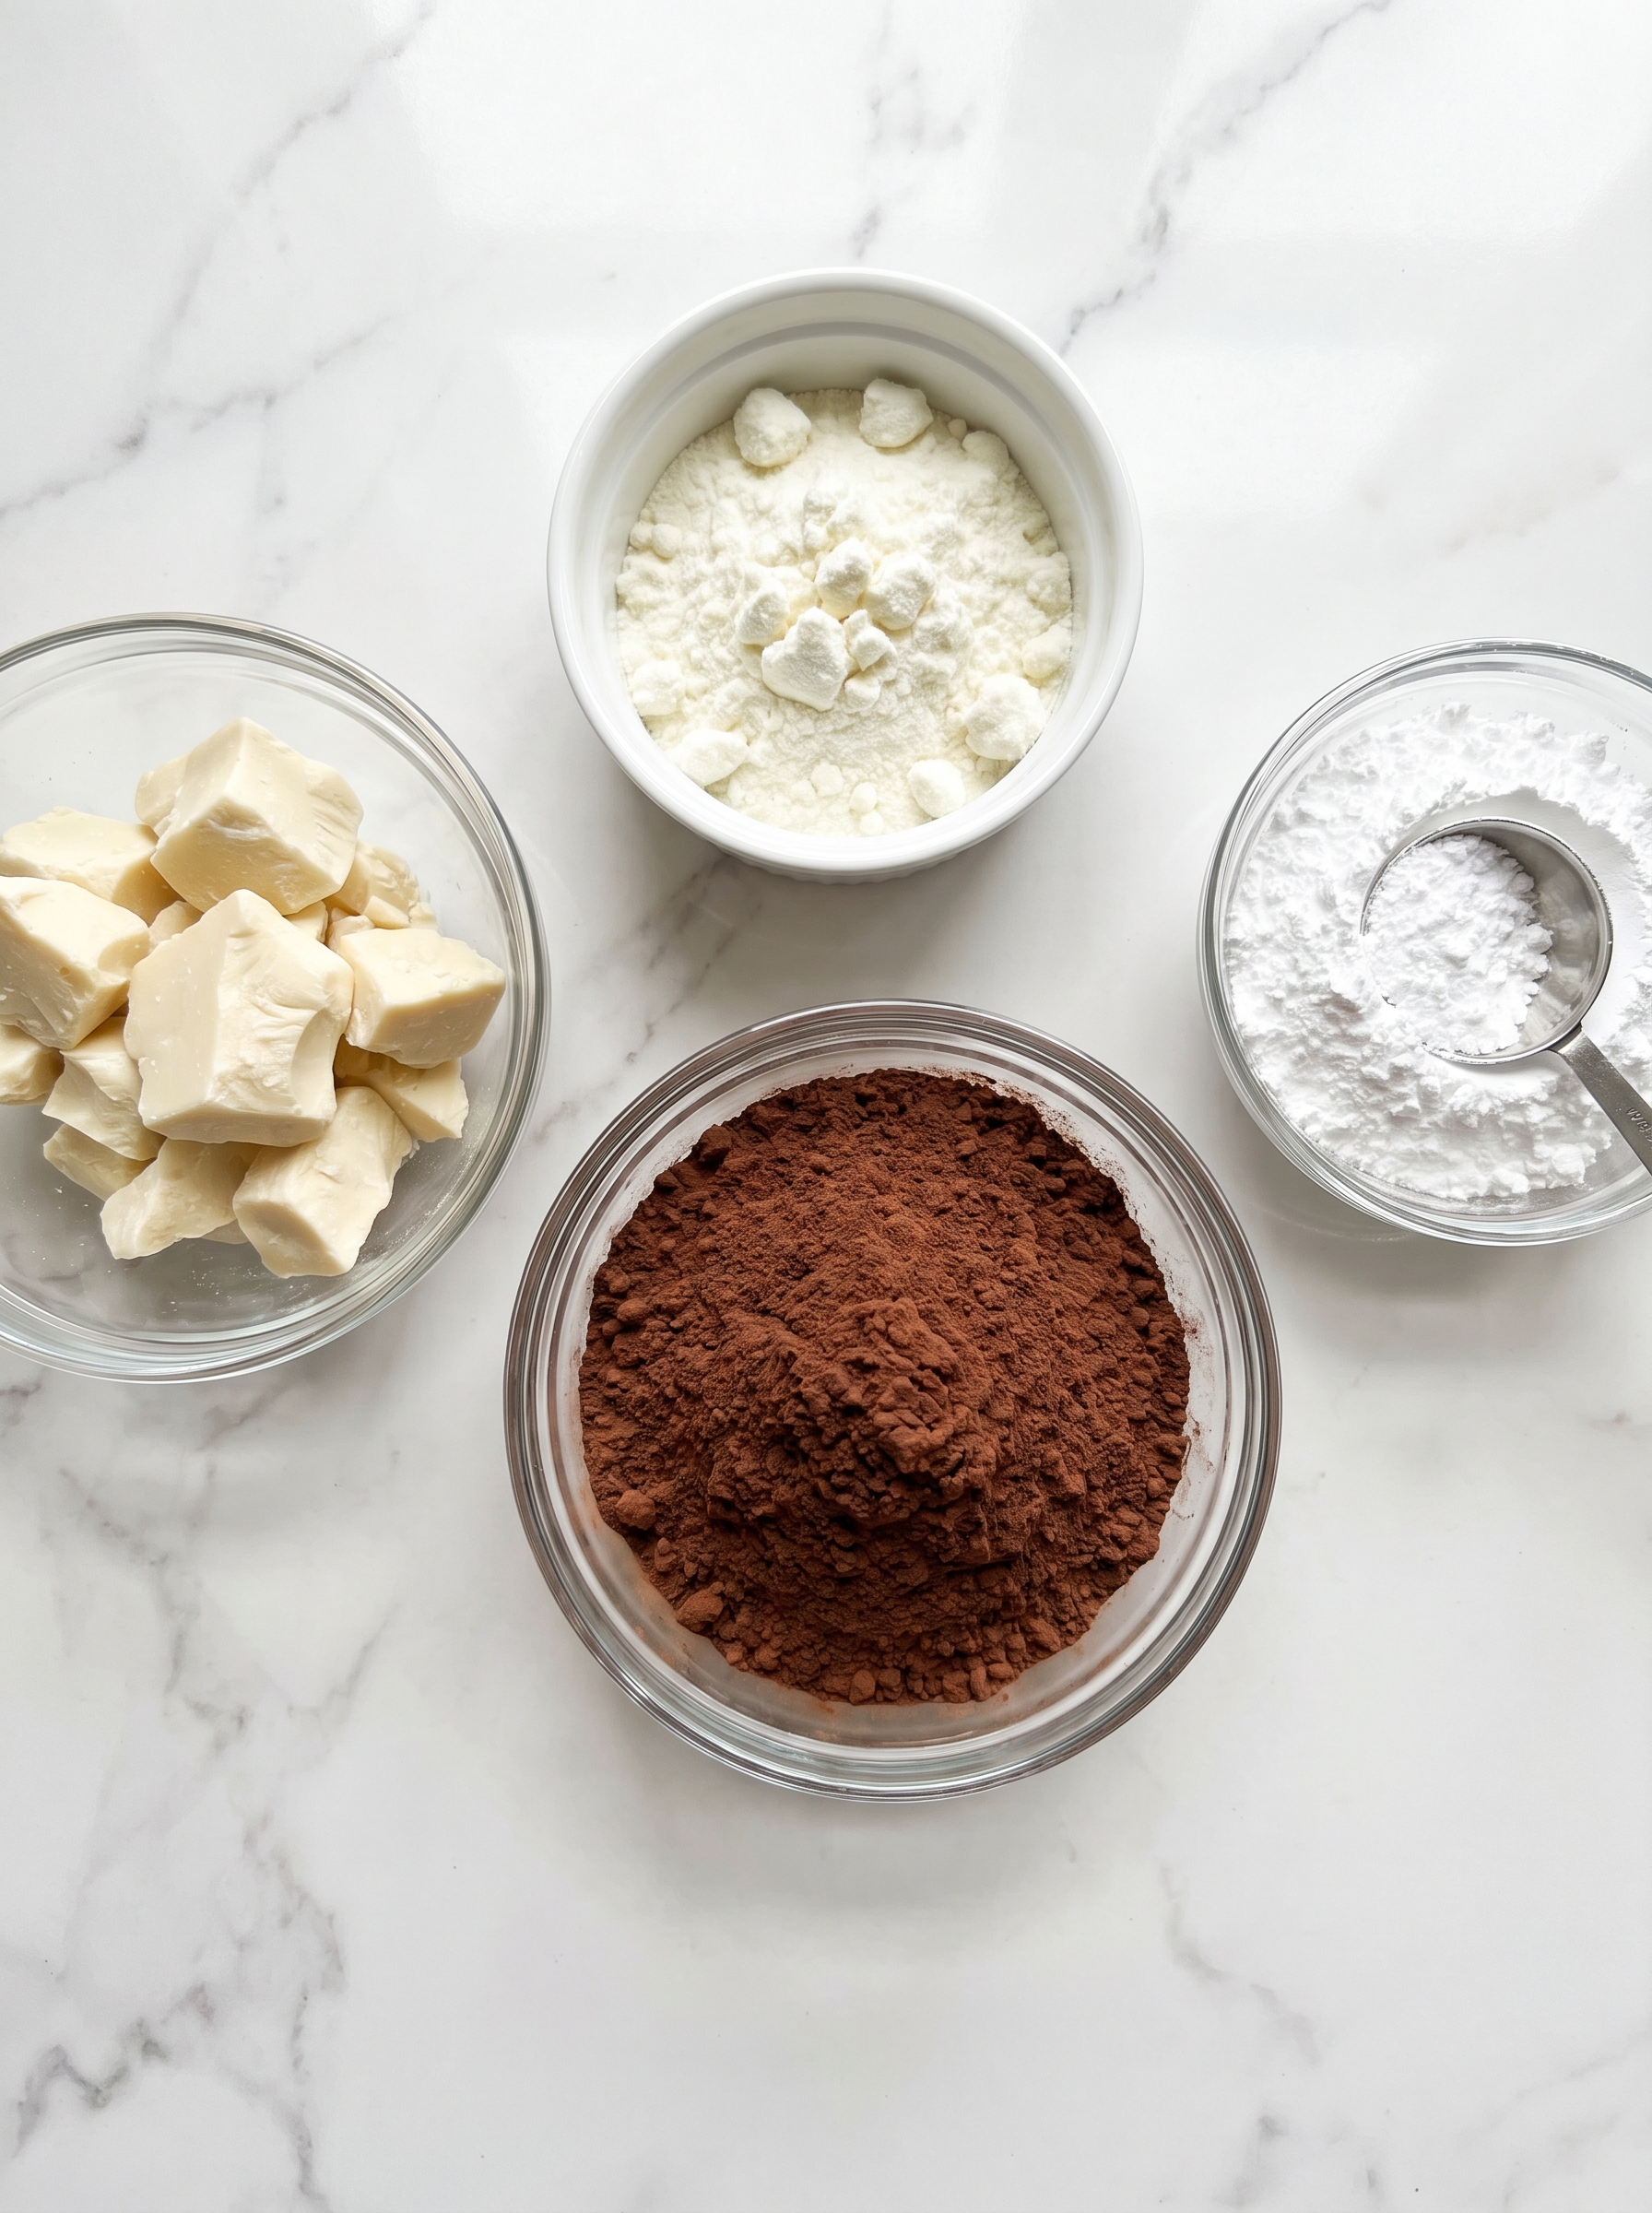
You Must Know
- This makes about 6 small bars or 6 generous sized pieces depending on mold size. Each serving is roughly 227 kcal as calculated for the ingredient amounts listed.
- Texture note: because there’s no commercial conching step, the bar may have a faintly grainy mouthfeel — patience in stirring and thorough sifting help minimize this.
- Storage: keep chilled for best texture and to prevent blooming; it will stay good for up to 2 weeks in the refrigerator and up to 3 months in the freezer when wrapped well.
- Allergen note: contains milk powder. Use coconut milk powder or plant-based milks for dairy-free adaptations (see substitutions).
My favorite aspect of this treat is its adaptability. Over the years I’ve learned that stirring technique and temperature control matter more than exact measurements. I often make a single test bar and taste before chilling — adjusting sweetness or adding a pinch of salt if it needs brightening. Family members appreciate the homemade touch even when the texture differs from store-bought bars.
Storage Tips
Store bars in an airtight container in the refrigerator to preserve snap and prevent blooming (that dusty white film). For short-term room temperature storage, keep bars in a cool pantry away from sunlight and heat — expect shorter shelf life. For long-term storage, wrap bars individually in parchment and place in a freezer-safe bag; they will keep quality for up to three months. To serve frozen bars, move them to the refrigerator for 30 minutes to avoid condensation. Use glass or BPA-free plastic containers to prevent odor transfer.
Ingredient Substitutions
If you don’t have cocoa butter, refined coconut oil is the easiest swap — refined keeps coconut flavor minimal. For dairy-free options, replace whole milk powder with non-dairy milk powder or powdered coconut milk; texture will be slightly different and less creamy but still tasty. Substitute powdered sugar with erythritol-based powdered sweeteners if you need lower sugar; use a powdered form to avoid graininess. If you prefer a darker bar, reduce milk powder to 2 tablespoons and increase cocoa powder by 1 tablespoon for a richer flavor.
Serving Suggestions
Serve small squares with espresso, steeped tea, or a glass of cold milk. For an elegant plate, sprinkle flaky sea salt or toasted hazelnuts on top right before the chocolate sets. You can also use this base to make filled chocolates: spoon a little chocolate into a mold, chill slightly to set, add a small spoonful of caramel or nut butter, then top with more chocolate and chill again.
Cultural Background
While commercial milk chocolate owes much to industrial processes like conching and tempering, homemade versions reflect a long tradition of making chocolate from limited ingredients. In many home kitchens, people adapted chocolate to local staples — using milk powder and local fats — creating comforting confections that vary by region. This recipe is inspired by accessible home chocolate techniques rather than formal European tempering methods.
Seasonal Adaptations
For winter gifts, mix in cinnamon, orange zest, or ground cardamom. Spring and summer bars benefit from bright flavors like lemon zest or chopped freeze-dried raspberries folded in just before pouring. For holidays, press festive sprinkles or edible gold leaf on top right after pouring for a celebratory touch.
Meal Prep Tips
To prepare ahead, double or triple the recipe and pour into silicone molds. Label containers with date and flavor. Portion into single-serving wrappers for quick grab-and-go treats. Keep a small jar of toasted nuts and a shaker of sea salt nearby so you can finish bars right before gifting or serving to keep textures fresh.
Making milk chocolate at home is a small ceremony that rewards patience and curiosity. Whether you’re experimenting with flavors or teaching a child to whisk, this recipe offers a hands-on, delicious result. Give it a try — and enjoy the little ritual of pouring warm chocolate into molds and waiting for the satisfying moment when it sets.
Pro Tips
Sift cocoa and powdered sugar to reduce grit and ensure a smoother texture.
Stir continuously off heat after removing from the pot to help create a more homogeneous mixture and reduce graininess.
Taste before chilling and adjust sweetness — you can always add more, but you can’t take it out.
Use refined cocoa butter for neutral flavor; unrefined may add floral notes that change the final taste.
Tap molds on the counter after pouring to release trapped air bubbles for a cleaner finish.
This nourishing homemade milk chocolate recipe is sure to be a staple in your kitchen. Enjoy every moist, high protein slice — it is perfect for breakfast or as a wholesome snack any time.
FAQs about Recipes
Can I use coconut oil instead of cocoa butter?
Yes. Use refined coconut oil instead of cocoa butter for a milder flavor; texture will be slightly softer.
How long will the homemade bars keep?
Keep the bars in an airtight container in the fridge up to 2 weeks or freeze for up to 3 months.
Tags
Homemade Milk Chocolate
This Homemade Milk Chocolate recipe makes perfectly juicy, tender, and flavorful steak every time! Serve with potatoes and a side salad for an unforgettable dinner in under 30 minutes.
Instructions
Sift dry ingredients
Sift the cocoa powder and powdered sugar to remove lumps. Whisk the milk powder into the sifted cocoa to ensure even distribution before combining with fat.
Set up double boiler
Fill a small pot one-third with water and bring to a gentle simmer. Set a heatproof bowl over the pot so the bottom does not touch the water.
Melt fat
Add 1/2 cup cocoa butter or coconut oil to the bowl and stir until fully melted and clear, about 4–6 minutes.
Incorporate powders
Lower heat to medium-low. Whisk in the cocoa powder then the milk powder until the mixture is smooth and uniform.
Sweeten gradually
Add the powdered sugar in three parts, stirring thoroughly after each addition. Taste and adjust sweetness if needed.
Finish off heat
Turn off heat, continue stirring for 5 minutes on the pot, then transfer the bowl to a heatproof surface and stir for another 5 minutes to stabilize the emulsion.
Pour into molds
Pour the chocolate into molds or an ice cube tray, tap to remove bubbles, and let sit at room temperature for 30 minutes before chilling.
Chill and unmold
Refrigerate for 30 minutes until fully set. Unmold the bars and store in an airtight container, refrigerated or frozen for longer storage.
Last Step: Please leave a rating and comment letting us know how you liked this recipe! This helps our business to thrive and continue providing free, high-quality recipes for you.
Nutrition
Did You Make This?
Leave a comment & rating below or tag
@royalrecipe on social media!
Categories:
You might also like...

Spicy Chicken and Jalapeño Thin Crust Pizza
Easy homemade thin-crust three-cheese spicy chicken and jalapeño pie — a flavor-packed pizza with a satisfying kick, perfect for pizza night or game day.

Creamy Pesto BLT Pasta Salad
A bright, creamy BLT pasta salad tossed with basil pesto, fresh greens, cherry tomatoes, and crisp bacon—perfect for warm-weather gatherings and meal prep.

Bang Bang Shrimp Pasta
Tender sautéed shrimp tossed with spaghetti and a creamy sweet-spicy bang bang sauce—ready in under 30 minutes for a weeknight favorite.
Did You Make This?
Leave a comment & rating below or tag @royalrecipe on social media!
Rate This Recipe
Share This Recipe
Enjoyed this recipe? Share it with friends and family, and don't forget to leave a review!
Comments (1)
This recipe looks amazing! Can't wait to try it.
Comments are stored locally in your browser. Server comments are displayed alongside your local comments.
Hi, I'm Amara!
What's Popular

30-Minute Meals!
Join to receive our email series which contains a round-up of some of our quick and easy family favorite recipes.