>>
30-MINUTE MEALS! Get the email series now →


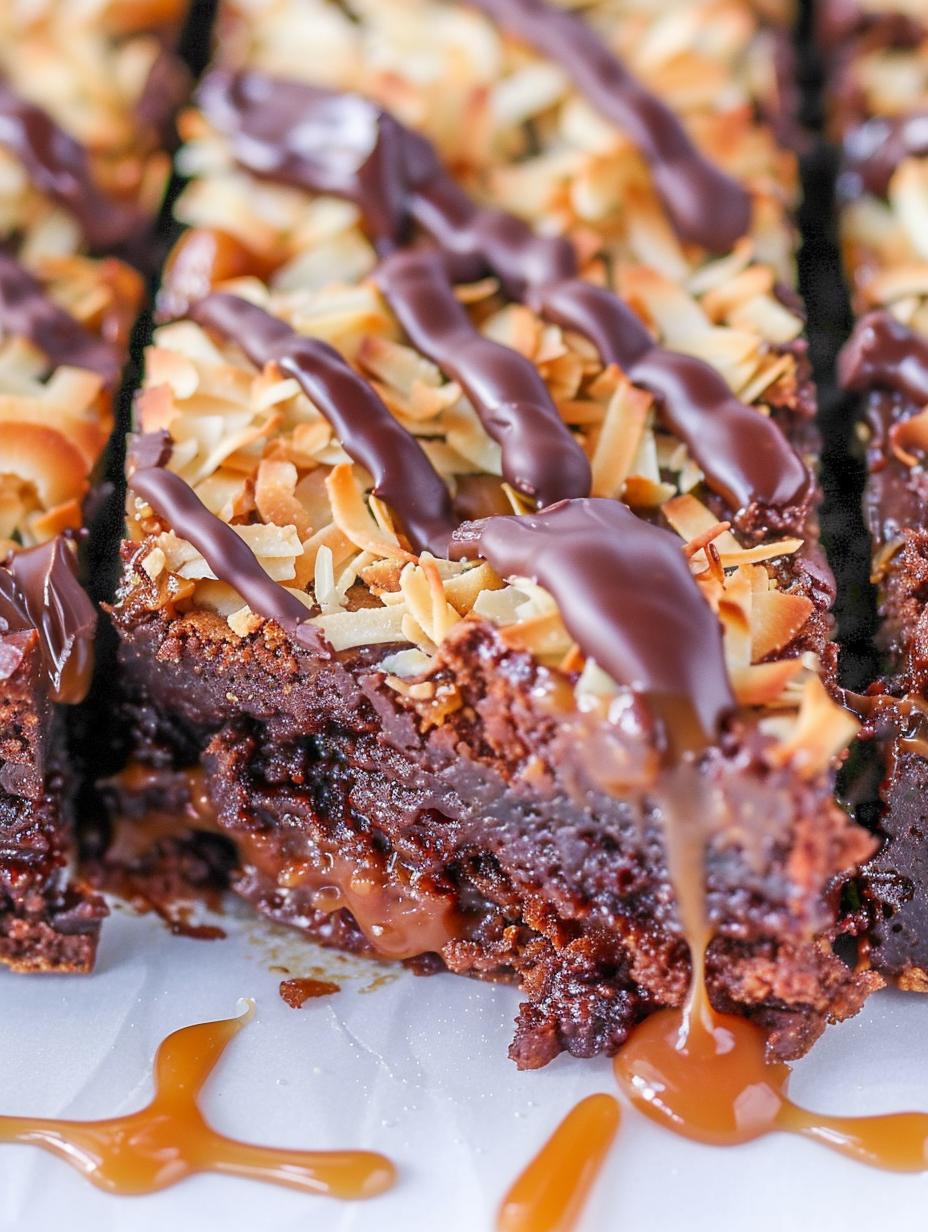
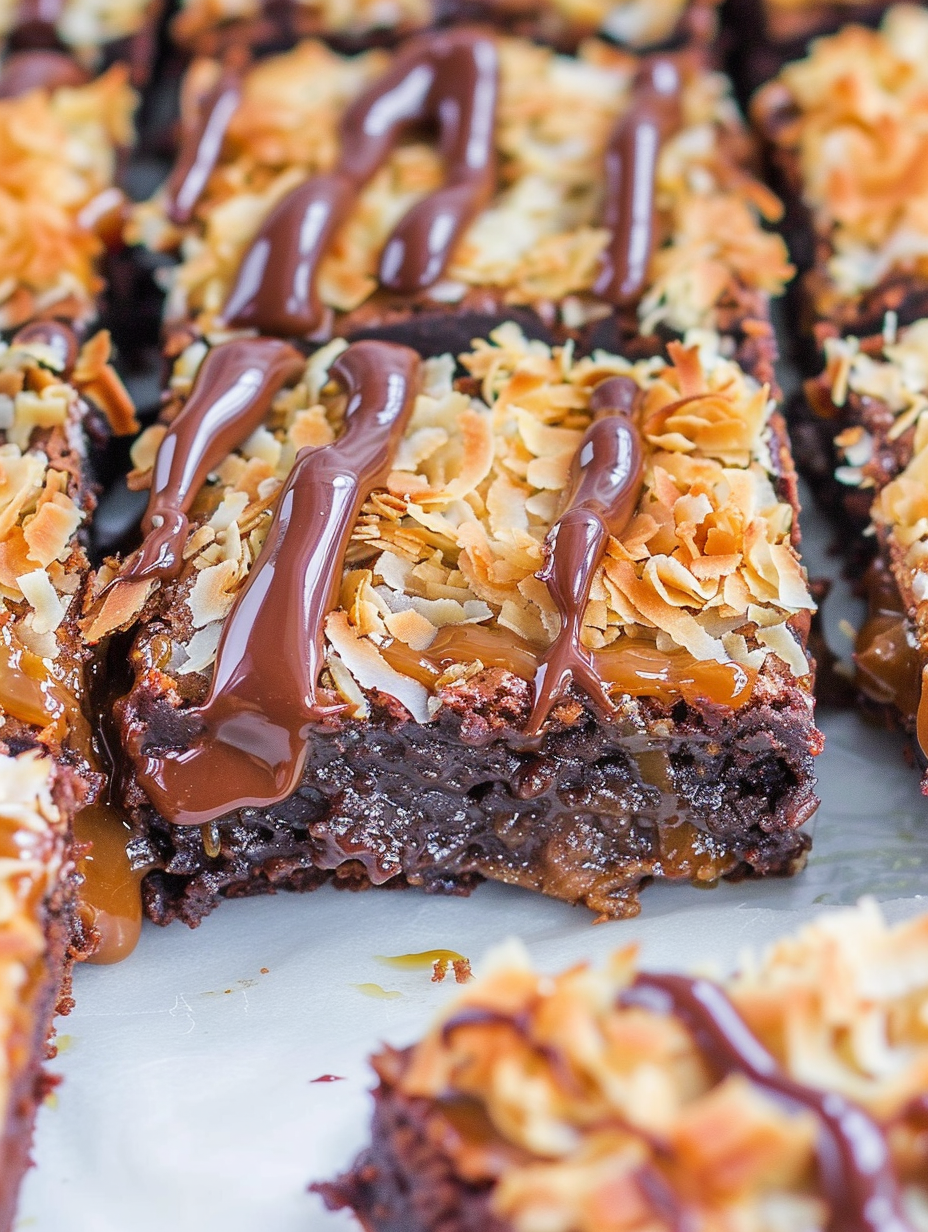
Boxed brownies transformed with toasted coconut, gooey caramel, and a melted chocolate drizzle for a quick crowd pleasing treat.
This recipe takes a humble boxed brownie mix and elevates it into something that tastes indulgent and handmade. I first made these on a rainy afternoon when I had a box of mix on the counter and a craving for something sticky sweet with a hint of tropical coconut. The contrast of tender, fudgy brownie below and a toasted coconut and caramel topping above creates the same flavor notes I loved in childhood cookies, but in a quicker, mess friendly bar. These have become my go to dessert for casual get togethers because they travel well and please a crowd.
I discovered the charm of this combination when I was short on time but wanted a dessert that looked like I spent all evening baking. Toasting the coconut brings out a toasty, almost nutty flavor that pairs beautifully with a buttery caramel topping. Finish these with melted semi sweet chocolate for a glossy drizzle that sets into thin ribbons. The result is chewy, creamy, and satisfyingly sweet, with enough texture to make every bite interesting. They are also forgiving enough for home bakers of any skill level and adaptable enough for seasonal variations.
I remember the first time I served these at a small weekend brunch and watched friends reach for seconds. My sister told me they tasted like a bakery bar, and my neighbor requested the recipe. Over the years I refined the coconut toasting time and the way I apply the caramel so the topping never slides off. These small adjustments make a big difference when you want presentation and flavor without fuss.
One of my favorite things about this combination is how adaptable it is. Guests often ask if I made the bars from scratch because the toasted coconut and caramel masking a boxed base create an impression of effort without the time commitment. I love making these for casual gatherings because they can be prepped ahead and chilled until needed. My kids like them straight from the fridge while adults often prefer them at room temperature so flavors are more pronounced.
Store cooled bars in a single layer in an airtight container to maintain the toasted coconut texture. If stacking is necessary place parchment or wax paper between layers. Refrigerate for up to five days. To freeze, wrap the pan tightly with plastic wrap and then foil or cut individual bars and place them in a freezer safe container with parchment between layers. Thaw in the refrigerator overnight and bring to room temperature before serving for best texture. Reheat briefly in a warm oven for a softer caramel if desired.
If you prefer a less sweet topping use unsweetened shredded coconut and choose a caramel labeled lower sugar. Swap the semi sweet chocolate for dark chocolate to add bitterness that cuts through the sweetness. For a nutty variation fold in half a cup of finely chopped toasted pecans or macadamia nuts to the coconut mixture. Vegan versions are possible by selecting a dairy free boxed mix, dairy free caramel topping, and dairy free chocolate chips, though textures will vary slightly.
Serve squares with a light dusting of powdered sugar or a sprinkle of flaky sea salt for contrast. Pair with vanilla ice cream for a warm and cold experience, or serve alongside coffee for an afternoon treat. These bars also make a festive addition to dessert platters and travel well to potlucks. For a party presentation cut into smaller bite size pieces and arrange on a platter with fresh berries for color contrast.
The flavor profile mirrors a well known cookie that blends coconut caramel and chocolate, inspired by classic American cookie culture which often borrows tropical ingredients like coconut. Coconut became popular in North American baking in the early twentieth century when preservation and transport improved. The combination of toasted coconut and caramel draws on both island flavors and comfort oriented American sweets, making these bars a hybrid that feels both nostalgic and slightly exotic.
In warmer months lighten the topping by using unsweetened coconut and a thinner caramel, and serve chilled. For autumn add a pinch of ground cinnamon and nutmeg to the coconut mixture or fold in chopped roasted hazelnuts. For winter holidays incorporate orange zest into the melted chocolate drizzle or use salted caramel for a festive salty sweet edge.
Assemble and chill the bars the night before serving to save time. Keep the ganache or melted chocolate in a small airtight container and drizzle right before leaving the house if transporting to maintain glossy ribbons. If making multiple pans prepare the coconut and caramel mixture in advance and store it at room temperature for up to twenty four hours. Label containers with date and contents to avoid confusion when storing in a shared fridge.
These bars are simple enough to become a family favorite yet special enough to serve to guests. Try a small test batch to dial in your toasting time and caramel brand preference. Once you find the sweet spot you will have a dependable, delicious dessert that delivers consistent smiles.
Toast shredded coconut in the oven for three to five minutes stirring every minute to ensure even color.
Warm the caramel bottle in a bowl of hot water for a few minutes to loosen it before combining with the coconut.
Use a warm knife wiped dry between cuts for clean brownie edges when slicing.
This nourishing easy samoa brownies recipe is sure to be a staple in your kitchen. Enjoy every moist, high protein slice — it is perfect for breakfast or as a wholesome snack any time.
Yes, use a certified gluten free boxed mix and check labels on caramel and chocolate for gluten free certification.
Toast the coconut until light golden while stirring very frequently. Coconut can burn quickly so stay nearby.
This Easy Samoa Brownies recipe makes perfectly juicy, tender, and flavorful steak every time! Serve with potatoes and a side salad for an unforgettable dinner in under 30 minutes.
Prepare and bake the boxed mix as directed on the package. Use the suggested pan size and check at the lower end of the baking time to maintain a fudgy texture. Allow to cool slightly on a rack.
Spread shredded coconut on parchment on a baking sheet. Return to the hot oven and toast while stirring often until light golden, about three to five minutes. Watch closely to avoid burning.
Pour the caramel topping into a bowl, add the toasted coconut and stir until evenly coated. Warm the caramel bottle in hot water if it is too thick to stir easily.
Spoon and spread the coconut caramel mixture over the cooled brownies using the back of a spoon or offset spatula, creating an even layer.
Melt semi sweet chocolate chips in short bursts, stirring until smooth. Transfer to a piping bag and drizzle thin ribbons over the coconut layer for a decorative finish.
Refrigerate until the topping is set and the chocolate is firm, about thirty minutes. Use a warm clean knife for neat slices and cut into sixteen squares.
Last Step: Please leave a rating and comment letting us know how you liked this recipe! This helps our business to thrive and continue providing free, high-quality recipes for you.
Leave a comment & rating below or tag
@royalrecipe on social media!

Easy homemade thin-crust three-cheese spicy chicken and jalapeño pie — a flavor-packed pizza with a satisfying kick, perfect for pizza night or game day.

A bright, creamy BLT pasta salad tossed with basil pesto, fresh greens, cherry tomatoes, and crisp bacon—perfect for warm-weather gatherings and meal prep.

Tender sautéed shrimp tossed with spaghetti and a creamy sweet-spicy bang bang sauce—ready in under 30 minutes for a weeknight favorite.
Leave a comment & rating below or tag @royalrecipe on social media!
Enjoyed this recipe? Share it with friends and family, and don't forget to leave a review!
This recipe looks amazing! Can't wait to try it.
Comments are stored locally in your browser. Server comments are displayed alongside your local comments.
Join to receive our email series which contains a round-up of some of our quick and easy family favorite recipes.
