>>
30-MINUTE MEALS! Get the email series now →


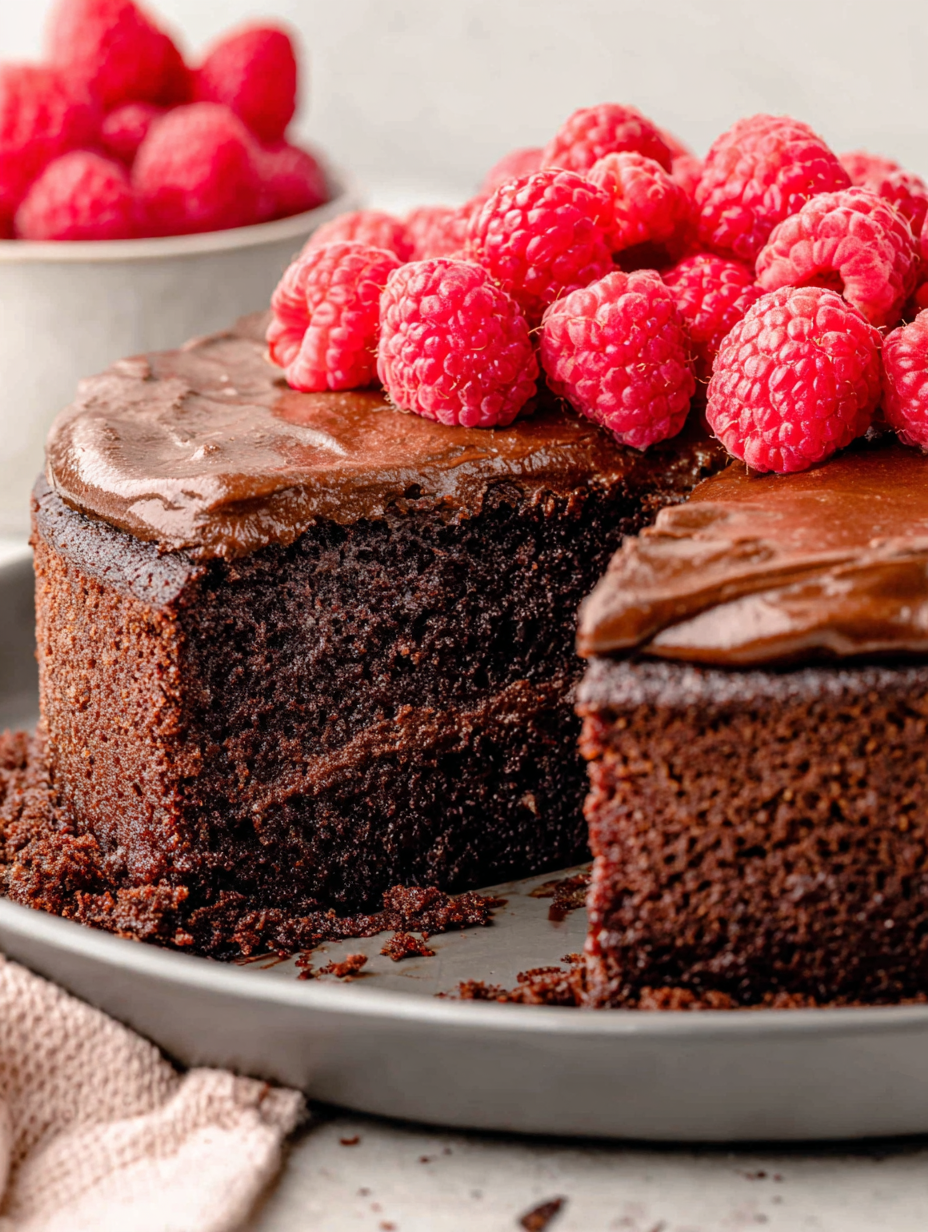
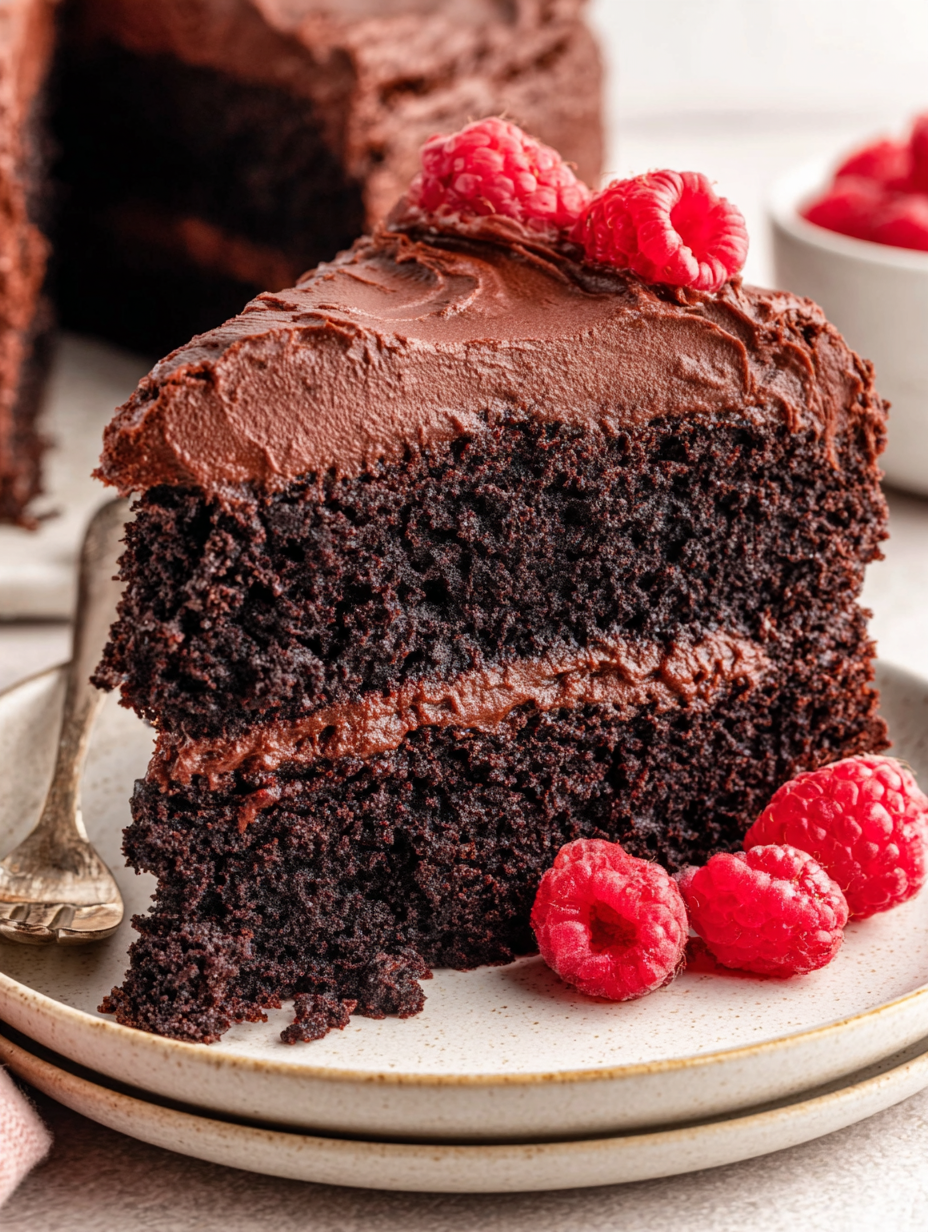
A dense, fudgy chocolate cake that tastes like a cross between a classic chocolate cake and a pan of brownies—perfect for celebrations or simple dessert cravings.

This chocolate brownie cake is the sort of dessert that makes people stop mid-conversation and take notice. I first discovered this blend of cake and brownie on a rainy afternoon when I wanted something more substantial than a regular sheet cake but less finicky than a layered torte. The result was a dense, deeply chocolate cake with a fudgy interior and a thin, crackly top—exactly like taking a bite of your favorite pan of brownies, but with the size and presentation of a cake. It quickly became the dessert I bring to potlucks and family dinners because it travels well and pleases a crowd.
What makes this version special is the simple formula: Dutch-process cocoa for depth and smoothness, warm water to bloom the chocolate notes, and buttermilk for tender crumb while keeping density. The texture is intentionally dense rather than airy—think moist, almost fudgy center with a fragile top crust. The cake is forgiving to bake and easy to dress up: slice it in half and fill with whipped chocolate cream, spread a glossy ganache, or simply dust powdered sugar and serve with vanilla ice cream. This is my go-to when I want serious chocolate impact without complicated steps.
Personally, my family went from skeptical to obsessed after the first trial. My nephew declared it "the best chocolate thing ever" and requested the same cake for his birthday the following year. Each time I slice into that crackled top and reveal the moist interior, I remember why this hybrid cake deserves a regular spot in the rotation.
My favorite part is that this formula is wildly adaptable. On a busy weeknight I’ll slit the cake and spread a quick chocolate whipped cream; for gatherings I make a rich ganache the day before and let the flavors marry overnight. Friends often ask for the simple version—no frosting—paired with a scoop of vanilla ice cream, which keeps things delightfully nostalgic.
Proper storage keeps the cake tender and preserves its fudgy texture. At room temperature, keep the cake in an airtight container or wrapped tightly in plastic wrap for up to 48 hours—avoid refrigeration for unfrosted cake unless your kitchen is very warm. If frosted, refrigerate for up to 5 days; bring to room temperature before serving to restore softness. For long-term storage, double-wrap individual slices in plastic and foil and freeze for up to three months. To reheat frozen slices, thaw in the refrigerator overnight and warm gently in a 325°F oven for 8–10 minutes or in the microwave for 15–20 seconds.
If you don’t have Dutch-process cocoa, you can use natural unsweetened cocoa, but note the flavor will be slightly more acidic and the rise may change; you can add 1/4 teaspoon extra baking soda to compensate. For a dairy-free version, substitute a plant-based butter and use a vegan buttermilk made from soy or almond milk plus a splash of vinegar—texture will be similar but flavor will shift. If you prefer a richer crumb, replace the 1/2 cup warm water with 1/2 cup freshly brewed strong coffee to deepen chocolate notes. For a lower-sugar dessert, try reducing sugar by 10–15%, but expect a less pronounced crackled top.
Serve the cake simply with a dusting of powdered sugar and a generous scoop of vanilla bean ice cream, or slice and layer with chocolate whipped cream for an elegant presentation. For celebrations, top with glossy dark chocolate ganache and sprinkle with flaky sea salt to balance the sweetness. Fresh berries—strawberries or raspberries—add bright contrast and work well when the cake is richly frosted. This cake also pairs beautifully with a cup of strong coffee or an espresso-based drink to cut through the chocolate richness.
While this cake is not linked to a single historic recipe, it embodies the American love of hybrid desserts—combining the dense, fudgy attributes of brownies with the format of a layer cake. Brownies themselves emerged in the United States in the early 20th century as a portable, single-pan treat. This adaptation honors that heritage by preserving the fudgy texture while presenting the dessert in a celebratory cake form that’s familiar for birthdays and gatherings.
Adjust the cake for different seasons: in winter, fold in a teaspoon of cinnamon or a pinch of espresso for warmth; in summer, sandwich with whipped mascarpone and top with macerated berries. For holidays, add orange zest to the batter and finish with a dark chocolate-orange glaze. Maple or salted caramel drizzles are excellent fall companions. Small changes to the garnish can shift the dessert’s character without changing the beloved fudgy base.
To streamline for a party, bake the cake a day ahead and store it lightly wrapped at room temperature if unfrosted, or refrigerated if frosted. Prepare frosting or ganache the day before and keep chilled; assemble an hour before guests arrive. Slice the cake into portions and store between layers of parchment in an airtight container for grab-and-go serving. Transport in a shallow cooler with ice packs if you’ll be on the road for more than an hour to prevent frosting from softening excessively.
This cake has become my go-to chocolate solution when I want something that looks special but doesn’t require fuss. It’s reliable, crowd-pleasing, and perfect for practicing that satisfying crackle on top. Try it once—you’ll soon have your favorite finishing touch for holidays or an indulgent weeknight dessert.
Measure flour by spooning into the cup and leveling with a knife to avoid compacting and a dry cake.
Use room-temperature eggs so they incorporate smoothly with melted butter and produce an even batter.
Warm the water to about 100°F to bloom the cocoa—this helps develop deeper chocolate flavor.
If using unsalted butter, increase the salt to 1/2 teaspoon to balance flavors.
Allow the cake to cool completely before slicing for cleaner layers when filling.
This nourishing chocolate brownie cake recipe is sure to be a staple in your kitchen. Enjoy every moist, high protein slice — it is perfect for breakfast or as a wholesome snack any time.
Yes—if using natural cocoa powder instead of Dutch-process, add 1/4 teaspoon extra baking soda or expect a slightly different flavor and rise.
Bake until a toothpick has a few moist crumbs attached; overbaking will produce a drier cake. Start checking at 35 minutes.
This Chocolate Brownie Cake recipe makes perfectly juicy, tender, and flavorful steak every time! Serve with potatoes and a side salad for an unforgettable dinner in under 30 minutes.
Preheat oven to 350°F. Grease and flour an 8-inch round cake pan or line the bottom with parchment. Place the rack in the center of the oven for even baking.
In a medium bowl, whisk together flour, Dutch-process cocoa, baking soda, baking powder, and salt until well combined and free of lumps.
In a large bowl, whisk granulated sugar with melted butter until glossy. Add eggs one at a time, then whisk in vanilla, ensuring a smooth mixture.
Alternate whisking in the dry mixture with buttermilk, then stir in warm water until the batter is smooth and pourable—do not overmix.
Pour batter into prepared pan and bake 35–45 minutes, testing at 35 minutes. The cake is done when a toothpick has a few moist crumbs attached and the top is slightly cracked.
Cool in the pan for 20 minutes, then invert onto a rack to cool completely. Slice horizontally if desired and frost with chocolate whipped cream, ganache, or your preferred frosting.
Last Step: Please leave a rating and comment letting us know how you liked this recipe! This helps our business to thrive and continue providing free, high-quality recipes for you.
Leave a comment & rating below or tag
@royalrecipe on social media!

Easy homemade thin-crust three-cheese spicy chicken and jalapeño pie — a flavor-packed pizza with a satisfying kick, perfect for pizza night or game day.

A bright, creamy BLT pasta salad tossed with basil pesto, fresh greens, cherry tomatoes, and crisp bacon—perfect for warm-weather gatherings and meal prep.

Tender sautéed shrimp tossed with spaghetti and a creamy sweet-spicy bang bang sauce—ready in under 30 minutes for a weeknight favorite.
Leave a comment & rating below or tag @royalrecipe on social media!
Enjoyed this recipe? Share it with friends and family, and don't forget to leave a review!
This recipe looks amazing! Can't wait to try it.
Comments are stored locally in your browser. Server comments are displayed alongside your local comments.
Join to receive our email series which contains a round-up of some of our quick and easy family favorite recipes.
