>>
30-MINUTE MEALS! Get the email series now →


Thick, moist, fudgy brownie-flavored truffles that require no baking — just four main ingredients, a short chill, and a smooth chocolate coating.
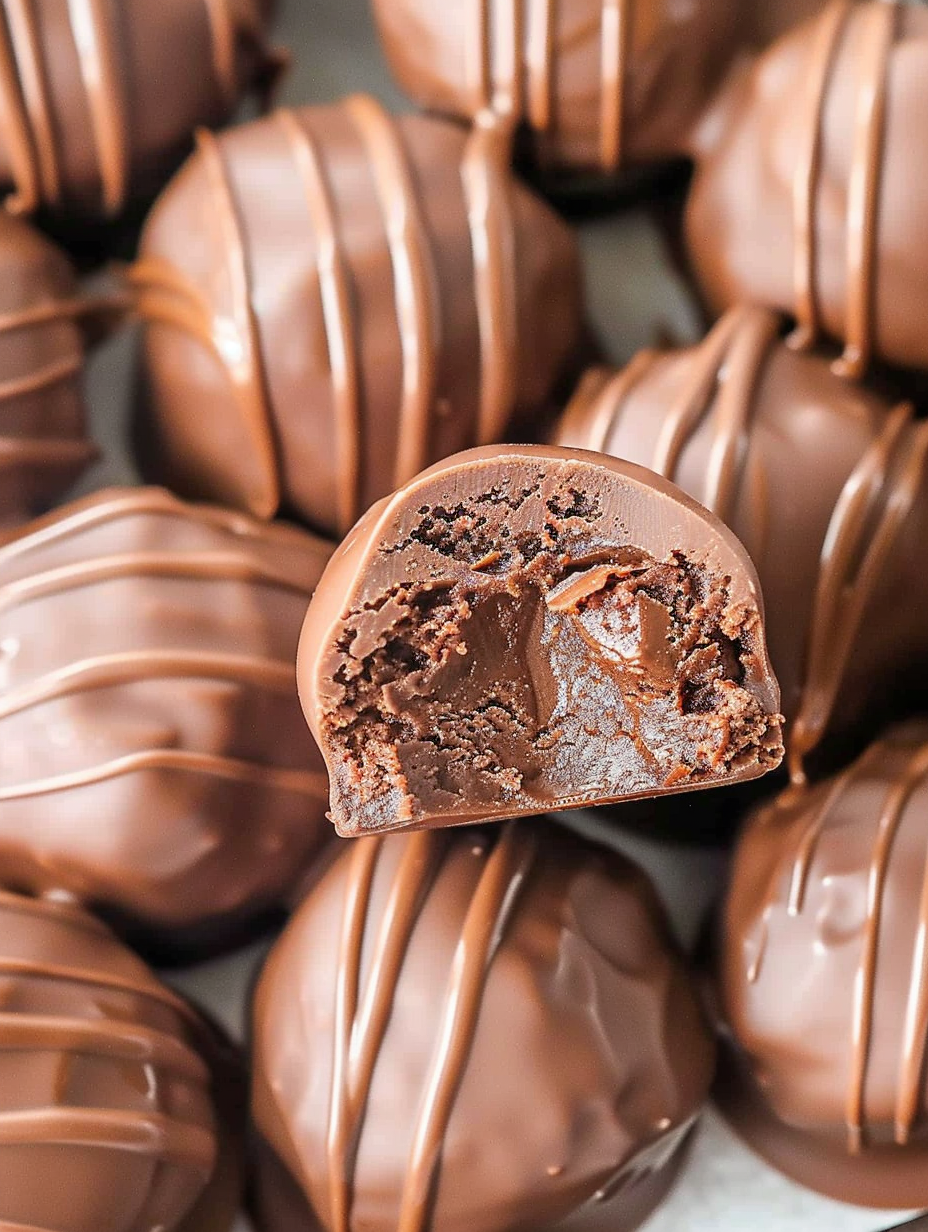
This recipe for Brownie Truffles began as a late-night pantry experiment and quickly turned into the dessert I bring to every potluck. I first discovered the combination of boxed brownie mix and cream cheese when I wanted the rich taste of a dense, fudgy brownie without the oven time. The result is a bite-sized confection that tastes like brownie batter with a creamy, tangy note from the cream cheese and a glossy chocolate shell that snaps just slightly when bitten. They’re thick, moist, soft and utterly addictive — perfect for when you want a dense chocolate hit in two bites.
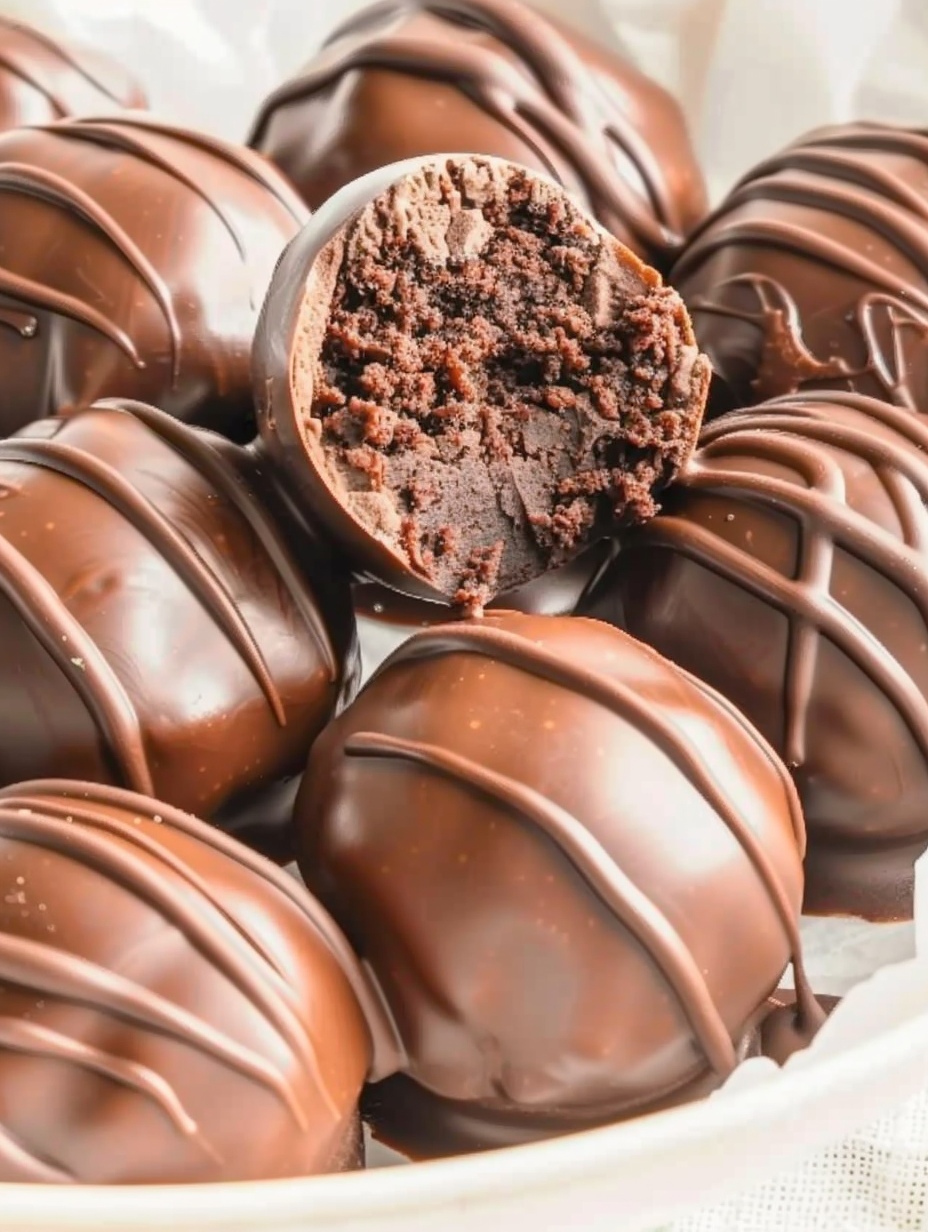
I remember the first time I made these for a small holiday party: guests stood around the platter, taking the smallest pieces at first and then returning for seconds and thirds. The fudge-like center and the thin, tempered-feeling coating make each one feel indulgent. Best of all, these require no baking beyond heat-treating the boxed mix if you prefer — they’re simple, fast, and straightforward, making them a go-to when you need an impressive yet stress-free dessert.
In my kitchen these truffles are a celebration shortcut. Family members describe them as “grown-up brownie bites” because the cream cheese adds a subtle tang that balances the sweetness. I’ve shipped them in little boxes for friends and they’ve arrived still glossy and decadent, making them one of my most requested gifts.
My favorite thing about these is how adaptable they are. I’ve added espresso powder to the mix for an adult coffee twist, and once I rolled some in finely chopped toasted pecans for texture. At a recent family gathering, someone wrote on a napkin “best brownie I didn’t bake” — a title I gladly accept.
Store the truffles in a single layer or with parchment between layers in an airtight container. Refrigerate for up to a week; they remain best within the first 3–4 days when the coating is glossy and the center is creamy. For longer storage, freeze on a tray until solid, then transfer to a freezer-safe container for up to 3 months. To serve after freezing, move them to the refrigerator to thaw for several hours to avoid condensation forming on the coating.
If you’d like a dairy-free version, use vegan cream cheese and dairy-free melting wafers; texture will be slightly different but still delicious. Substitute Crisco with refined coconut oil or cocoa butter for a similar sheen. For gluten-free, use a certified gluten-free brownie mix. To add flavor, fold in 1 teaspoon espresso powder or 1–2 tablespoons of liqueur (Kahlúa, Frangelico) during mixing — reduce liquid elsewhere to keep the dough firm.
Arrange the truffles on a decorative platter with small paper liners for easy picking. They pair beautifully with dark roast coffee, espresso, or a dessert wine like port. For holiday presentations, sprinkle with crushed candy cane, edible gold dust, or chopped toasted nuts. These also make lovely edible gifts when packed in small boxes with tissue paper.
While truffles originally refer to ganache-based confections inspired by the mushroom-like shapes of French truffles, the concept has evolved into many cultural adaptations. These brownie-based truffles are an American twist on the idea: they borrow the shape and coated finish of classic truffles but use pantry-friendly boxed mix to create an easy, modern sweet that resonates with home cooks seeking convenience without sacrificing flavor.
Change the coating or the mix-ins to suit the season: add peppermint extract and candy cane topping for winter holidays, orange zest and dark chocolate for a bright winter citrus note, or dust with matcha for spring events. For summer gatherings, enlist contrasting textures like toasted coconut or crushed freeze-dried raspberries for a refreshing bite.
Make the truffle centers up to two days ahead and keep them chilled. Melt and dip on the day you plan to serve for the best shine, or dip and freeze for future use. Use a cookie scoop to ensure uniform sizes for consistent chilling and glassy coatings. Label containers with dates, especially if freezing, so you always know the freshest batch to serve.
These brownie truffles are simple, adaptable, and reliably decadent. Whether you make them for a party or an everyday treat, they’re sure to earn a permanent place in your dessert rotation. Enjoy — and don’t forget to save a few for yourself.
Chill truffle centers well before dipping; cold centers reduce cracking and chocolate pull.
Use a small amount of shortening (or coconut oil) in the coating to keep chocolate glossy and pourable.
Work in small batches when dipping to keep the melted chocolate at an even temperature and consistency.
If the coating seizes, warm it gently over the double boiler and stir in a bit more shortening to smooth.
For uniform truffles, use a cookie scoop and weigh a sample ball to match sizes.
This nourishing brownie truffles recipe is sure to be a staple in your kitchen. Enjoy every moist, high protein slice — it is perfect for breakfast or as a wholesome snack any time.
Yes. For best food safety, heat-treat the dry brownie mix before using in a no-bake preparation, or choose a brand you are comfortable using raw. If unsure, toast the mix in a skillet over medium heat for a few minutes, stirring constantly, then cool before combining.
Freeze on a tray until solid, then transfer to a freezer-safe container for up to 3 months. Thaw in the refrigerator before serving to minimize condensation on the coating.
This Brownie Truffles recipe makes perfectly juicy, tender, and flavorful steak every time! Serve with potatoes and a side salad for an unforgettable dinner in under 30 minutes.
Line a large cookie sheet with parchment paper and set aside to receive truffles after forming.
In a medium mixing bowl, cream together the heat-treated brownie mix, softened cream cheese, and vanilla until a uniform dough forms. Scrape bowl as needed.
Using a 1½-inch cookie scoop, portion and roll the mixture into smooth balls between your palms. Place on the prepared parchment-lined sheet.
Refrigerate the formed balls for 1 hour to firm the centers before dipping.
Melt the chocolate wafers in a heatproof bowl over simmering water, stirring constantly. Add 1 tablespoon shortening and stir until silky smooth, then remove from heat.
Use dipping forks to fully coat each chilled truffle in melted chocolate. Tap off excess and return to parchment paper.
Refrigerate coated truffles for 30 minutes to set the shell.
Melt reserved wafers and a small additional amount of shortening until smooth. Transfer to a piping bag or zip-top bag for decorating.
Pipe decorative lines over each truffle, then chill another 30 minutes until fully set. Store refrigerated in an airtight container.
Last Step: Please leave a rating and comment letting us know how you liked this recipe! This helps our business to thrive and continue providing free, high-quality recipes for you.
Leave a comment & rating below or tag
@royalrecipe on social media!

Easy homemade thin-crust three-cheese spicy chicken and jalapeño pie — a flavor-packed pizza with a satisfying kick, perfect for pizza night or game day.

A bright, creamy BLT pasta salad tossed with basil pesto, fresh greens, cherry tomatoes, and crisp bacon—perfect for warm-weather gatherings and meal prep.

Tender sautéed shrimp tossed with spaghetti and a creamy sweet-spicy bang bang sauce—ready in under 30 minutes for a weeknight favorite.
Leave a comment & rating below or tag @royalrecipe on social media!
Enjoyed this recipe? Share it with friends and family, and don't forget to leave a review!
This recipe looks amazing! Can't wait to try it.
Comments are stored locally in your browser. Server comments are displayed alongside your local comments.
Join to receive our email series which contains a round-up of some of our quick and easy family favorite recipes.
