
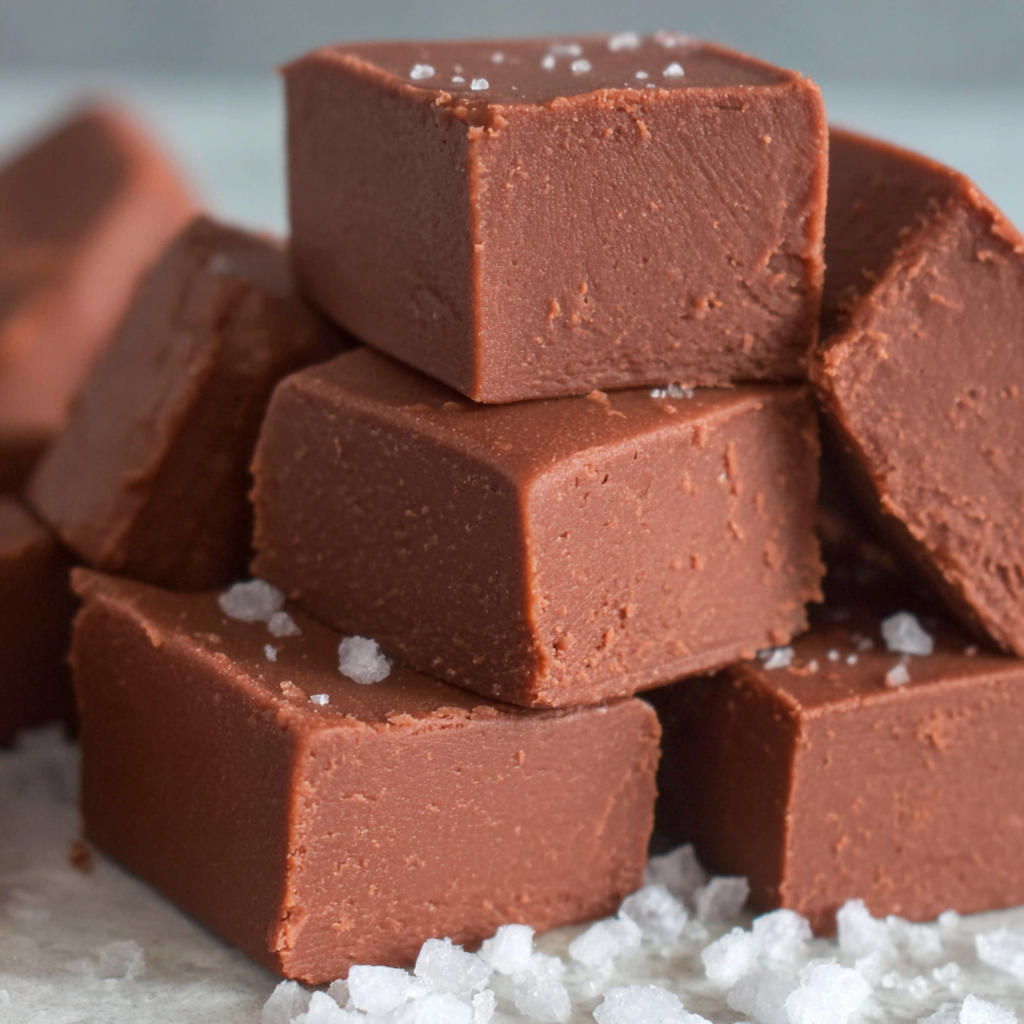
Best Mackinac Island Fudge

A creamy, nostalgic fudge inspired by Mackinac Island — rich chocolate, buttery texture, and simple stovetop technique for reliably delicious results.
This recipe is dedicated to anyone who lives for a melt-in-your-mouth chocolate bite. I first fell for Mackinac Island fudge during a summer trip when the sweet shop windows lined the street and the air smelled of chocolate and caramel. Back at home I set out to capture that luxurious texture with a simple stovetop technique — and what emerged is a confection that tastes like a memory: dense, glossy, and just firm enough to slice. It’s the kind of sweet that comforts the way a warm blanket does in winter, but brightens an afternoon tea in summer.
I made this batch for a family brunch and watched my most sugar-wary aunt go back for thirds. The combination of unsalted butter, two kinds of sugar, and a generous dusting of confectioners' sugar yields a fudge that is reliably creamy and slightly chewy, with a cocoa backbone that never overwhelms. This is not a temperamental candy; it’s forgiving, perfect for home cooks who want big flavor without fuss. Make it for holiday plates, bake sales, or simply as a small ritual: a short, sweet ceremony that rewards patience and a good spatula.
Why You'll Love This Recipe
- Simple stovetop method that produces glossy, sliceable fudge in under an hour from start to finish — prep in about 15 minutes and finish in roughly 30 minutes of gentle cooking.
- Uses pantry staples: butter, milk, granulated and brown sugar, unsweetened cocoa, and confectioners' sugar — no condensed milk required.
- Highly forgiving: exact temperature timing is relaxed; visual cues (thick ribbon from the spoon, glossy surface) guide you if you don’t have a candy thermometer.
- Customizable: add toasted nuts, sea salt flakes, or melt-in flavor extracts without changing the base technique.
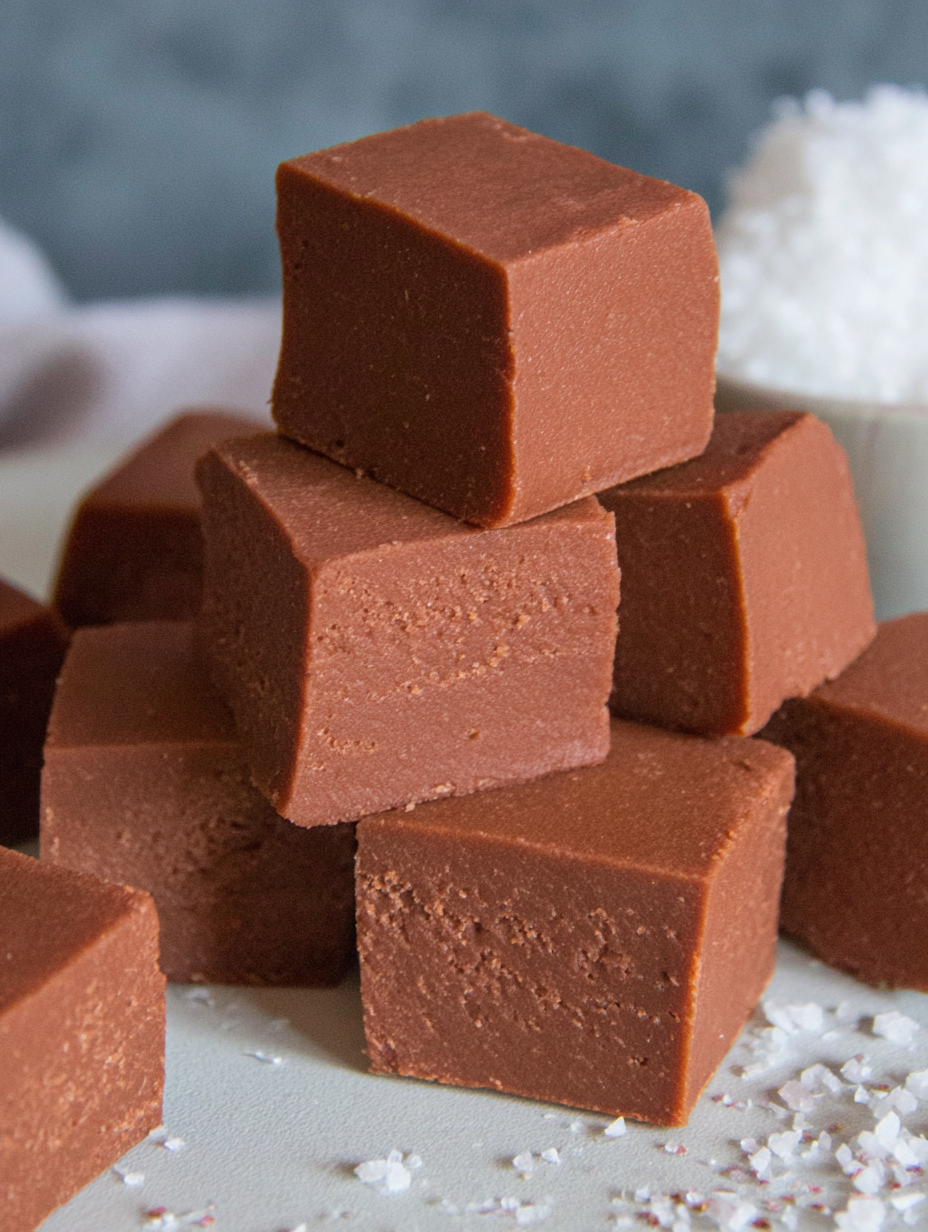
- Great for gifting and slicing — wraps beautifully into a log and keeps well in the refrigerator for up to a week or frozen for longer storage.
- Crowd-pleaser across ages: creamy texture and balanced sweetness appeal to both kids and adults.
When I first tested this version I made three small adjustments: reducing the milk slightly, adding a pinch of salt, and sifting the confectioners' sugar for a truly silky finish. Each tweak nudged a good batch into a great one — my family’s verdict was unanimous: this is the closest homemade version we’ve had to that iconic Mackinac shop fudge.
Ingredients
- Unsalted butter — 8 tablespoons: Choose a high-quality block butter (e.g., Kerrygold or Plugrá) for richness and stable fat content; room-temperature pieces melt evenly and help prevent scorching.
- Milk — 1/2 cup: Whole milk gives the best mouthfeel; you can use 2% in a pinch but expect a slightly less creamy finish.
- Granulated white sugar — 1/2 cup: Regular table sugar provides structure and chew; measure by spooning into the cup and leveling for accuracy.
- Brown sugar (firmly packed) — 1/2 cup: Adds moisture and caramel notes; dark or light brown both work — dark gives deeper flavor.
- Pinch of salt: Balances sweetness and brightens the cocoa; flaky sea salt on top is a lovely finishing touch.
- Vanilla extract — 1 teaspoon: Use pure vanilla extract for aromatic depth — avoid imitation for the best flavor.
- Unsweetened cocoa powder — 1/2 cup: Prefer Dutch-processed for a milder, chocolatey flavor or natural unsweetened for brighter cocoa notes.
- Confectioners' sugar — 2 cups: Sift before using to avoid lumps; this is the body of the fudge and determines the final set.
Instructions
Combine and bring to a gentle boil: In a medium heavy-bottomed saucepan set over medium heat, combine the butter, milk, granulated sugar, brown sugar, and a pinch of salt. Stir constantly with a heatproof spatula to dissolve the sugar and melt the butter evenly. Once the mixture comes to a gentle boil, reduce heat to low and keep it at a soft rolling simmer. Cook to a thickened syrup (about 6 minutes): Maintain a low boil for roughly 6 minutes, stirring almost continuously. You’re looking for the mixture to thicken slightly and coat the back of the spoon — it should form a ribbon when drizzled back into the pan. If you have a candy thermometer, aim for about 234–240°F (soft-ball stage), but visual cues work fine here. Avoid high heat to prevent graininess and burning. Cool slightly before finishing: Remove the pan from the heat and let the hot mixture cool for 3–5 minutes. Cooling briefly prevents the confectioners' sugar from overheating and becoming gritty when added. The surface should still be warm but not aggressively steaming. Finish with cocoa, confectioners' sugar, and vanilla: Sift the confectioners' sugar and cocoa into a large heatproof bowl. Pour the slightly cooled syrup over them, add the vanilla, and whisk or beat vigorously until smooth and thick. Work quickly — the mixture sets as it cools. If it feels too loose, add a tablespoon of sifted confectioners' sugar at a time until you reach a spreadable, glossy consistency. Shape and chill: Turn the fudge onto an 8-by-8-inch baking sheet lined with parchment or a silicone mat and smooth the top with an offset spatula to about 1-inch thickness. For a log, spoon onto plastic wrap and shape into a cylinder, twist the ends to tighten, then chill. Refrigerate until firm, about 30 minutes, then slice into 16 pieces using a sharp knife warmed under hot water for clean cuts.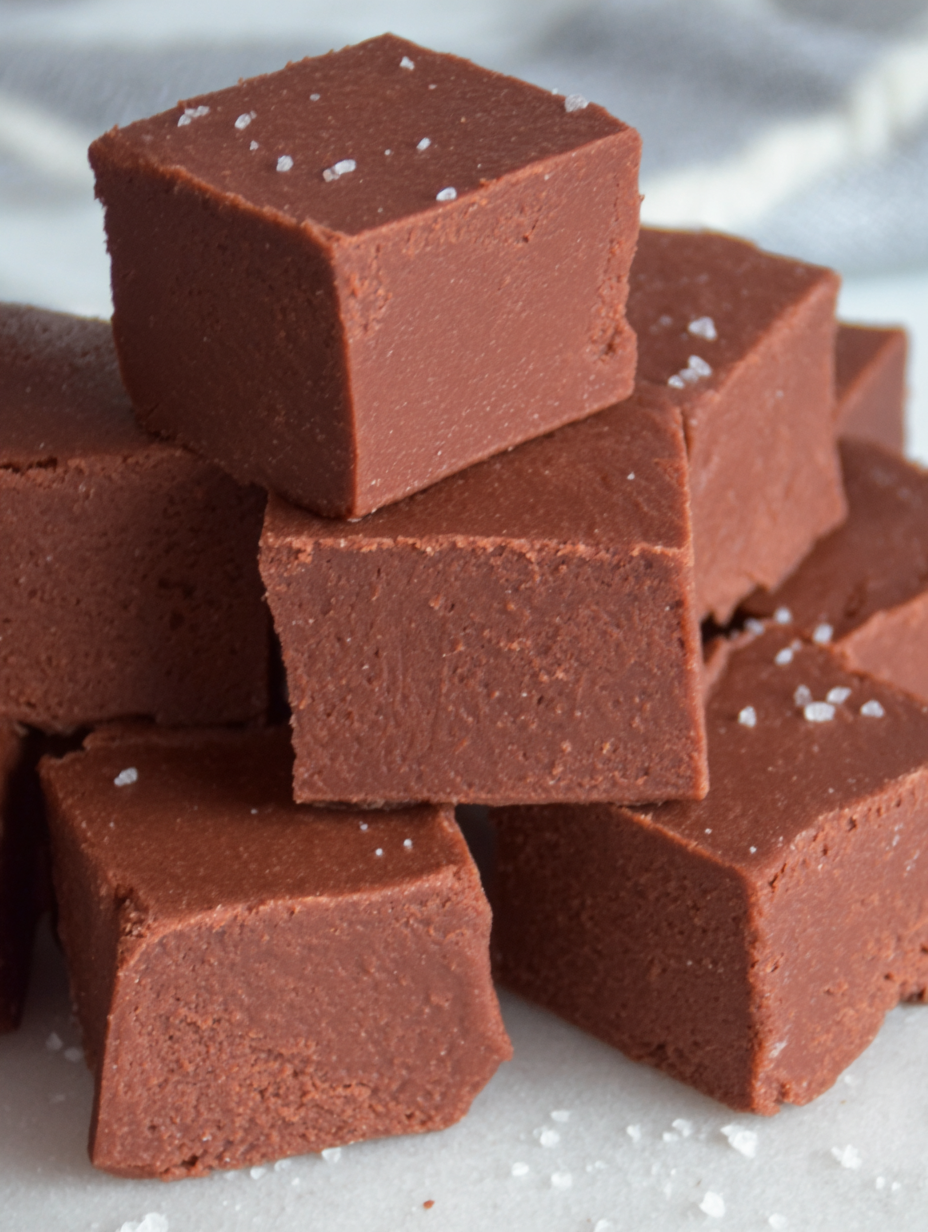
You Must Know
- Store finished pieces in an airtight container in the refrigerator for up to one week; they also freeze well for up to three months when wrapped tightly.
- Nutrition note: this is a concentrated sweet—serve in small portions and label for guests with dairy allergies.
- If the texture becomes grainy, reheat gently with a tablespoon of milk and stir until smooth; re-sifted confectioners' sugar may rescue a slightly overworked batch.
- High altitude: increase the simmering time slightly to reach the same thickening; visual cues (ribboning) are more reliable than time alone.
One of my favorite memories with this confection was making a double batch for a neighborhood picnic — folks who never buy sweets asked for recipe notes. Watching people savor a simple slice, close their eyes, and smile reminded me that the best sweets are the ones that invite shared moments. It’s an easy recipe to scale and personalize, and the payoff is always immediate happiness.
Storage Tips
Keep pieces in a single layer or separated by parchment in an airtight container to avoid sticking and flavor transfer. At room temperature the texture will soften; refrigeration keeps slices firmer for neat presentation. For freezing, wrap portions individually in plastic wrap and place them in a zip-top bag; thaw in the refrigerator before serving to preserve texture. Avoid storing near strong-smelling foods to keep the chocolate taste pure. For gifting, present chilled slices in waxed paper inside a decorative box with a note to refrigerate upon receipt.
Ingredient Substitutions
For dairy-free variation, substitute the butter with a vegan butter alternative and full‑fat coconut milk for the milk — the texture will be slightly different and carry a faint coconut note. Swap brown sugar for molasses plus granulated sugar to increase depth, but maintain the total sugar weight. Use natural cocoa for a brighter flavor or Dutch-processed for mellow richness—expect a slight color and acidity shift. You can also fold in 1/2 cup chopped toasted pecans or walnuts for texture; if adding nuts, mix them in after the confectioners' sugar step so they stay evenly distributed.
Serving Suggestions
Serve thin slices with a strong black coffee or tea to balance the sweetness. For a dessert board, pair small squares with salted nuts, dried cherries, and a mild cheese like ricotta salata for contrast. Use as a decadent sandwich layer between cookies, or melt gently to drizzle over vanilla ice cream for an instant sundae. Sprinkle a few flakes of Maldon sea salt on top just before serving to heighten the chocolate notes.
Cultural Background
Mackinac Island fudge is part of a long confection tradition tied to coastal and tourist towns where candy-making became both craft and attraction. Fudge on Mackinac took hold in the late 19th and early 20th centuries; candy shops pulled, shaped, and sold confections as souvenirs. The island’s fudge became iconic for its variety of flavors and for the showmanship of small-batch candy makers. This home version draws on that heritage: simple, nostalgic, and meant to be shared.
Seasonal Adaptations
In winter, fold in a teaspoon of cinnamon and a pinch of ground ginger for a spiced holiday twist; add peppermint extract (1/2 teaspoon) and crushed candy canes for a festive touch. In summer, stir in a tablespoon of orange zest and a splash of orange extract for a chocolate-orange pairing. For spring, mix in 1/2 cup dried strawberries or chopped freeze‑dried fruit after the sugar step to introduce bright, fruity notes without impacting texture drastically.
Meal Prep Tips
Make a double batch and freeze half in individually wrapped portions for quick gifting or last-minute dessert needs. If preparing for an event, chill the log until just firm, slice once, then return to chill — this gives cleaner, even slices. Use silicone molds for shaped pieces; press the fudge into molds while still slightly warm for a professional look. Label containers with the date and any allergen notes when storing for longer than a few days.
Finally, don’t be afraid to make this your own. Adjust the sweetness, add a handful of toasted nuts, or top with a ribbon of caramel. The technique is forgiving and the results are reliably comforting — a small luxury you can create at home with minimal fuss and maximum flavor.
Pro Tips
Sift confectioners' sugar and cocoa before mixing to avoid lumps and achieve a silky texture.
Cool the cooked sugar mixture for 3–5 minutes before adding the dry ingredients to prevent overheating the confectioners' sugar.
Use a heavy-bottomed saucepan and stir almost continuously during the simmer to prevent scorching and graininess.
Warm your knife under hot water and wipe it dry for clean, even slices.
This nourishing best mackinac island fudge recipe is sure to be a staple in your kitchen. Enjoy every moist, high protein slice — it is perfect for breakfast or as a wholesome snack any time.
FAQs about Recipes
How long does this fudge keep?
Yes. Store in an airtight container in the refrigerator for up to one week or freeze for up to three months. Thaw in the fridge before serving.
How do I prevent grainy or burnt fudge?
Use a heavy-bottomed pan and keep the heat low; stir constantly to avoid scorching. Look for the ribboning visual cue if you don’t have a thermometer.
Tags
Best Mackinac Island Fudge
This Best Mackinac Island Fudge recipe makes perfectly juicy, tender, and flavorful steak every time! Serve with potatoes and a side salad for an unforgettable dinner in under 30 minutes.
Ingredients
Main
Instructions
Combine ingredients and bring to a boil
In a medium heavy-bottomed saucepan, combine butter, milk, granulated sugar, brown sugar, and a pinch of salt. Stir constantly over medium heat until the butter melts and the sugar dissolves, then bring to a gentle boil.
Simmer until thickened (about 6 minutes)
Reduce heat to low and simmer for about 6 minutes, stirring almost continuously. Look for the mixture to thicken and coat the back of the spoon; this visual ribbon indicates readiness.
Cool slightly
Remove the saucepan from the heat and let the hot syrup cool for 3–5 minutes so the confectioners' sugar won't become gritty when added.
Mix in dry ingredients and vanilla
Sift confectioners' sugar and cocoa into a large bowl, pour the warm syrup over them, add the vanilla, and whisk until smooth and glossy. Adjust consistency with small amounts of confectioners' sugar if too loose.
Shape and chill
Spread onto an 8-by-8-inch lined baking sheet (or form into a log on plastic wrap). Chill in the refrigerator until firm, about 30 minutes, then slice into 16 pieces.
Last Step: Please leave a rating and comment letting us know how you liked this recipe! This helps our business to thrive and continue providing free, high-quality recipes for you.
Nutrition
Did You Make This?
Leave a comment & rating below or tag
@royalrecipe on social media!
Categories:
You might also like...

Spicy Chicken and Jalapeño Thin Crust Pizza
Easy homemade thin-crust three-cheese spicy chicken and jalapeño pie — a flavor-packed pizza with a satisfying kick, perfect for pizza night or game day.

Creamy Pesto BLT Pasta Salad
A bright, creamy BLT pasta salad tossed with basil pesto, fresh greens, cherry tomatoes, and crisp bacon—perfect for warm-weather gatherings and meal prep.

Bang Bang Shrimp Pasta
Tender sautéed shrimp tossed with spaghetti and a creamy sweet-spicy bang bang sauce—ready in under 30 minutes for a weeknight favorite.
Did You Make This?
Leave a comment & rating below or tag @royalrecipe on social media!
Rate This Recipe
Share This Recipe
Enjoyed this recipe? Share it with friends and family, and don't forget to leave a review!
Comments (1)
This recipe looks amazing! Can't wait to try it.
Comments are stored locally in your browser. Server comments are displayed alongside your local comments.
Hi, I'm Amara!
What's Popular

30-Minute Meals!
Join to receive our email series which contains a round-up of some of our quick and easy family favorite recipes.